When you want make accumulated values from one or several elements in a certain period, You can use Balance on the Payroll menu. The use of balance can also facilitate the calculation of a formula and preparation of reports.
You can make a balance by following the following steps :
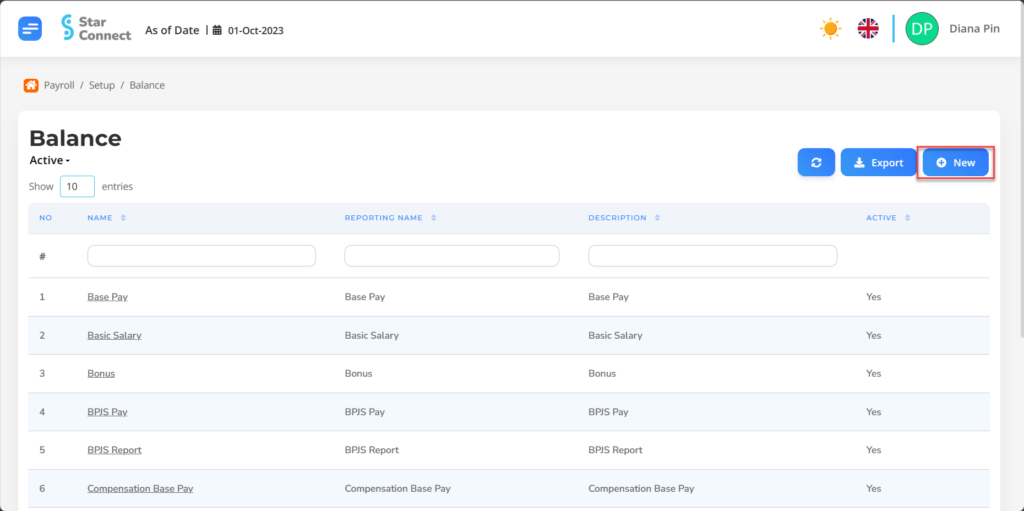
- On the Menu Payroll → Select Balance.
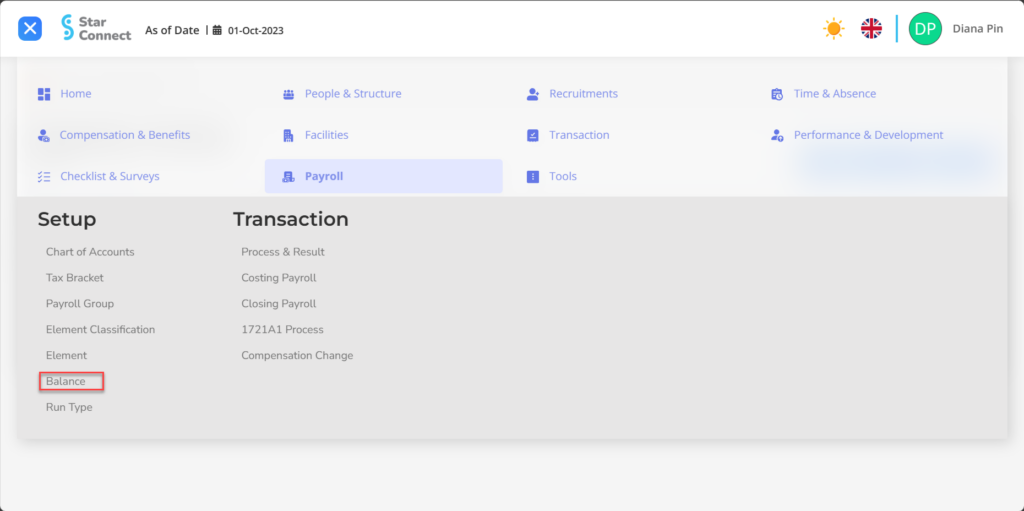
- Click the button New To make the balance on the Payroll menu.
- Fill in the section General with the type of balance you want to make.

| No | Feature | Information |
| 1 | Name | Filled with no Balance. |
| 2 | Description | Filled with description Balance. |
| 3 | Active | • Click Yes, If the type of balance is still active and processed in system. • Click No, If the type of balance has been not active, then the type of automatic balance lost in another menu. |
| 4 | Reporting Name | Filled with nama reporting Balance. |
- In part Element Classification, click the button “Add”, Then fill in the group grouping data on the balance based on its classification.
🔥IMPORTANT! It's worth paying attention to if you want mengisi data Element Classification which will be accumulated to the balance, make sure Element Classification on the Payroll menu has been made first.
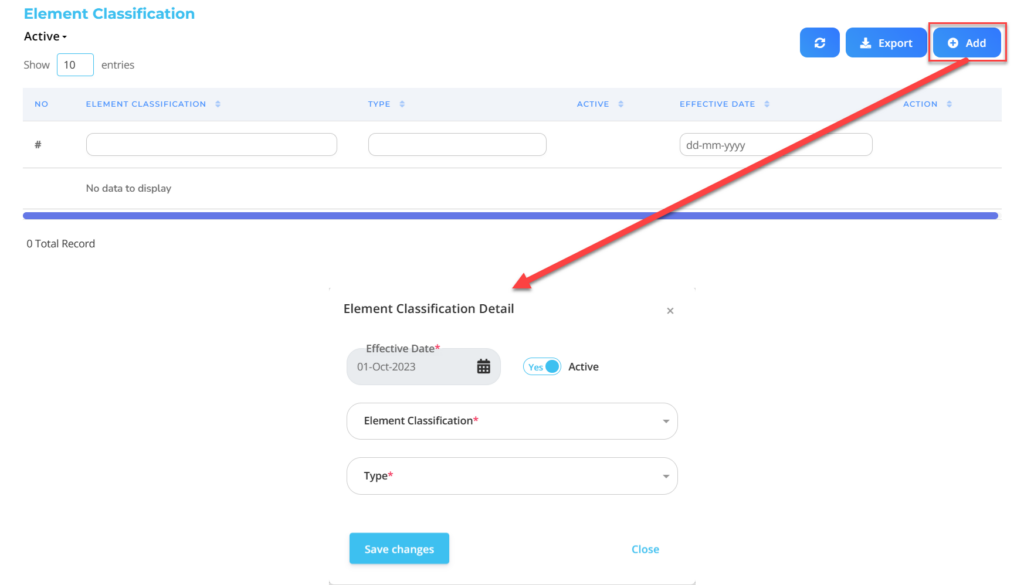
| No | Feature | Information |
| 1 | Effective Date | It will automatically fill in after input As of Date previously. |
| 2 | Active | • Click Yes, If the type of classification element is still active and processed in system. • Click No, If the type of classification element is already detailed not active, will not be processed at the balance. |
| 3 | Element Classification | Enter Element Classification which will be entered into the balance. |
| 4 | Type | Determine tipe Element Classification for the balance : (Related to element reduction /addition to be processed) • Add : As a component addition In the payroll process. • Substract : As a component reduction In the payroll process. |
Do save with a click button “Save Changes” in the detailed classification element section first, Then continue by filling in the completeness of other data balances.
- In part Element, click the button “Add”, Then fill in the grouping data on the balance.
🔥IMPORTANT! It's worth paying attention to if you want Fill in the data element which will be accumulated to the balance, make sure Element on the Payroll menu has been made first.
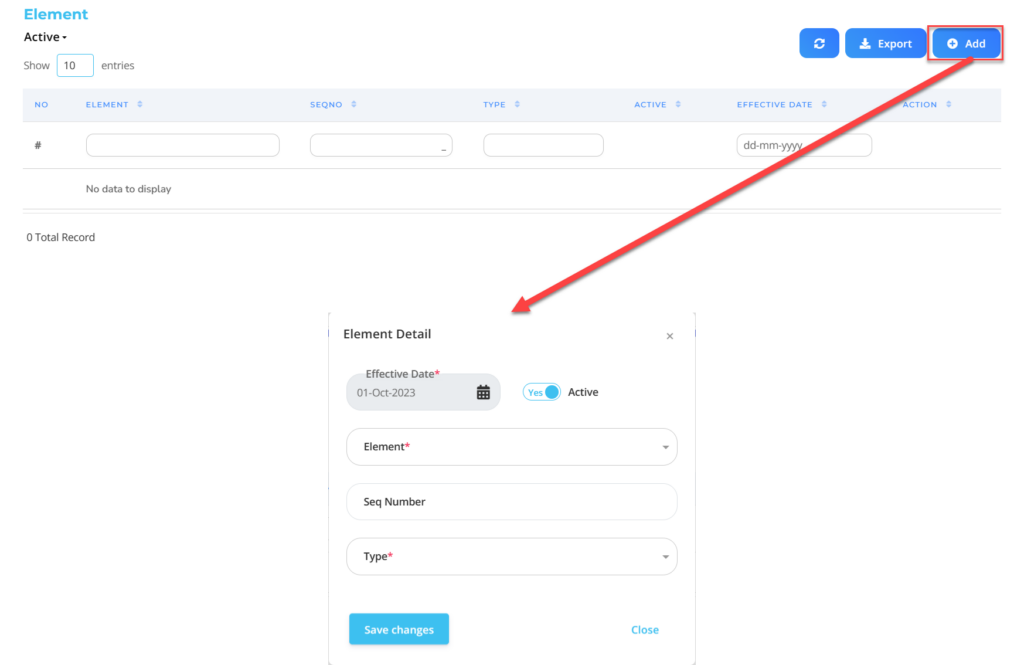
| No | Feature | Information |
| 1 | Effective Date | It will automatically fill in after input As of Date previously. |
| 2 | Active | • Click Yes, If the type of detailed element is still active and processed in balance. • Click No, If the type of detailed element is already not active, then it will not be processed at the balance. |
| 3 | Element | Enter Element which will be entered into the balance. |
| 4 | Seq Number | Choose element sequence which will appear in the results of the balance process. |
| 5 | Type | Determine Element type for the balance: (Related to element reduction /addition to be processed) • Add : As a component addition In the payroll process. • Substract : As a component reduction In the payroll process. |
Do save with a click button “Save Changes” in the detailed element section first, Then continue by filling in the completeness of other data balances.
- If you have entered all the balance information, then the final step is to do it save with a click button “Submit” At the very bottom of the balance page.
Read Also :
– How to Make a Tax Bracket
– How to Group Payroll
– How to Classify Elements in the Payroll Process
– How to Create Elements in the Payroll Process
– How to Create Element Groupings for the Payroll Process