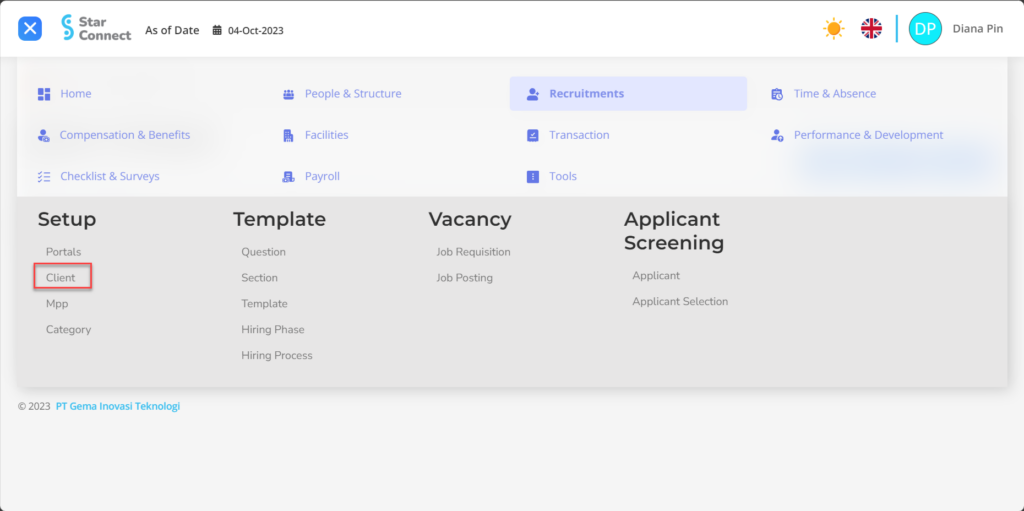
When you want register clients who will collaborate with your company, You can register by following the steps below :
- On the Menu Recruitment → Select Client.
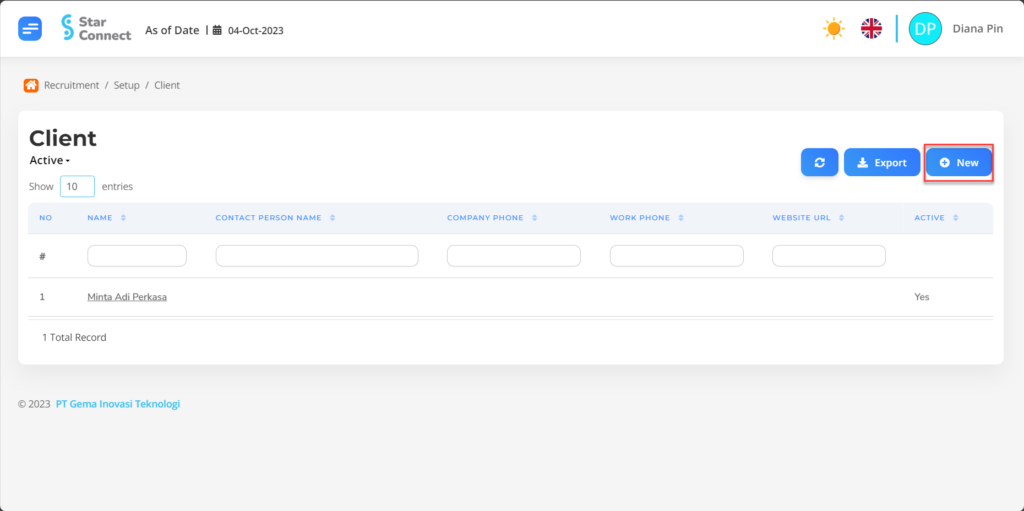
- Click the button New to register the Client.
- Fill in the section General with the Client details you want to display.
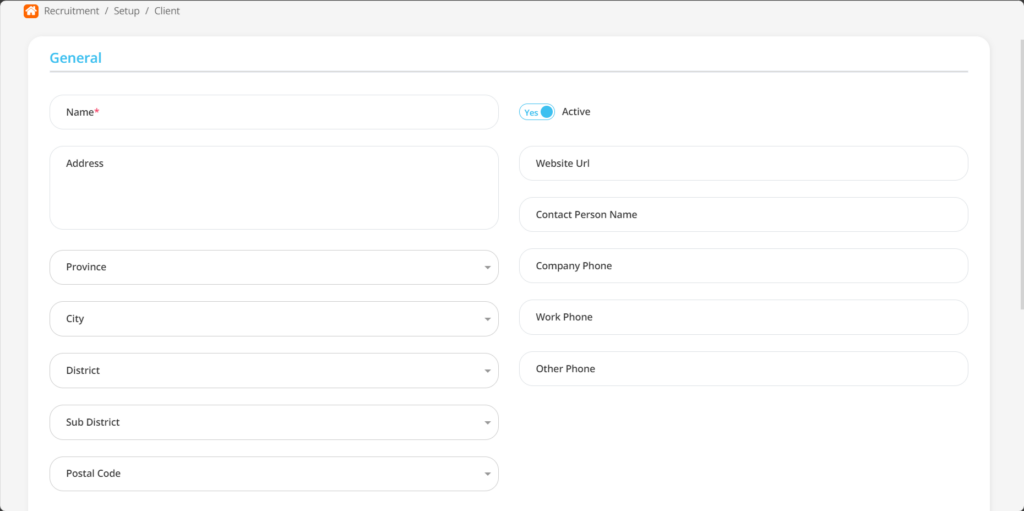
| No | Feature | Information |
| 1 | Name | Filled with no Client. |
| 2 | Address | Filled with address Complete Client. |
| 3 | Province | Filled with province Client location , in the form of LOV. |
| 4 | City | Filled with kota Client location , in the form of LOV. |
| 5 | District | Filled with regency Client location , in the form of LOV. |
| 6 | Sub district | Filled with subdistrict Client location , in the form of LOV. |
| 7 | Postal code | Filled with Postal code from the Client location. |
| 8 | Active | • Click Yes, if the Client data is still there active and processed in system. • Click No, if the employee's Client data is complete not active, then the Client data will be automatic lost in another menu. |
| 9 | Website URL | Enter website address Client. |
| 10 | Contact Person Name | Filled with contact name. |
| 11 | Company Phone | Enter office telephone number Client. |
| 12 | Work Phone | Enter mobile phone number Client to be registered. |
| 13 | Other Phone | Enter office telephone number or Mobile phone Client other, If there are. |
- Fill in the section Project with details of the Project to be carried out by the Client.
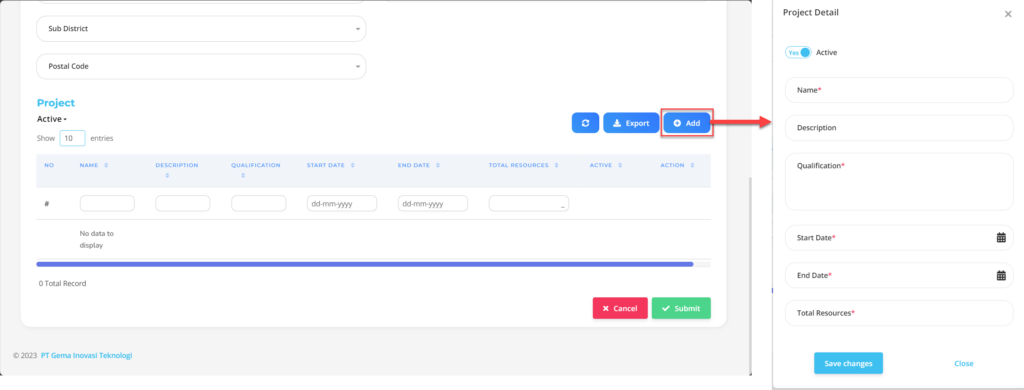
| No | Feature | Information |
| 1 | Active | • Click Yes, if the Project Client is still active and processed in system. • Click No, if the employee's Project Client already exists not active, then the Client data will be automatic lost in another menu. |
| 2 | Name | Filled with no project to be done by the Client. |
| 3 | Description | Filled detailed description from the project. |
| 4 | Qualification | Filled qualification untuk project Client. |
| 5 | Start Date | Its start project Client. |
| 6 | End Date | The end date project Client. |
| 7 | Total Resources | Total people who will-handle project. |
Do save with a click button “Save Changes” in the Project Details section first, then continue by filling in other complete client data.
- If you have entered all the Section information, then the final step is to do it save with a click button “Submit” at the very bottom of the Client page.
Read Also :
– How to Plan the Number of Workers Based on Position
– How to Make Request Information for Prospective Employees
– How to Create Questions for Assessing Prospective Employees
– How to Group Prospective Employee Questions
– How to Create a Prospective Employee Assessment Template