Extra Submission is a feature that functions for record employee permits. This menu can be used when you want to apply loan or Benefit claim, Loan, dan Expense.
In this section, You can learn :
1. Application for Benefits.
2. Loan Application.
3. Submission of Expenses.
1. Application for Benefits
For apply for benefits on the StarConnect application, You can follow the following steps :
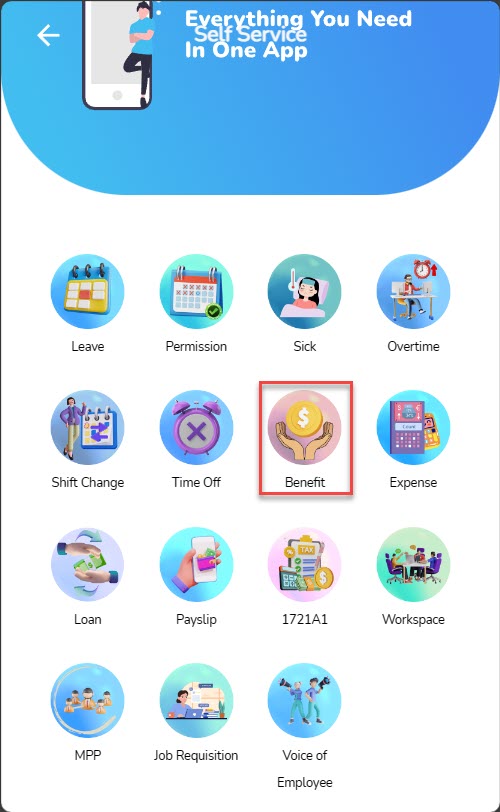
- On main page application, click menu Self Service.

- On Self Service page, choose Benefit.
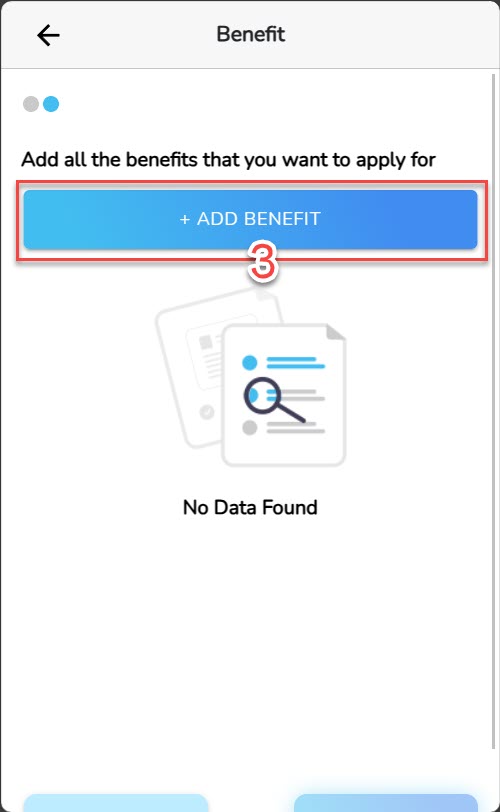
- On page form submission, Fill in the information regarding the date and transaction category that you want to submit.
- Attach additional notes as well as supporting documents (If there are).
- Click “Next”.

- Click “Add Benefit”.
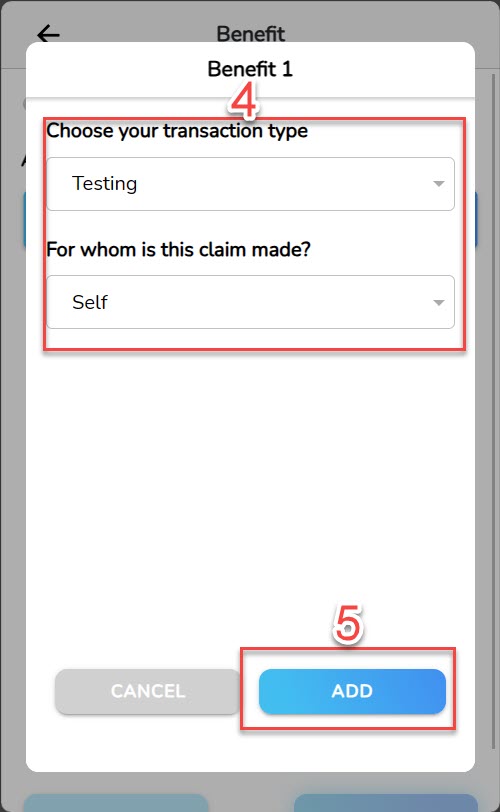
- On pop-up that appeared, add submission data you.
- Click “Add”.
- Submission benefit added successfully to the list. To add to the submission list, You can repeat the steps above again.
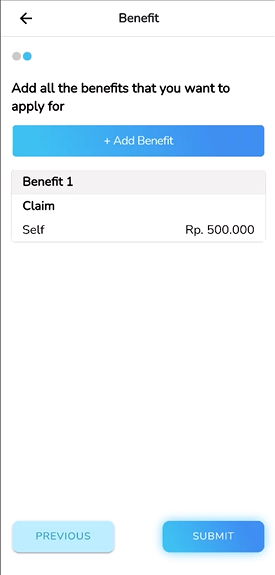
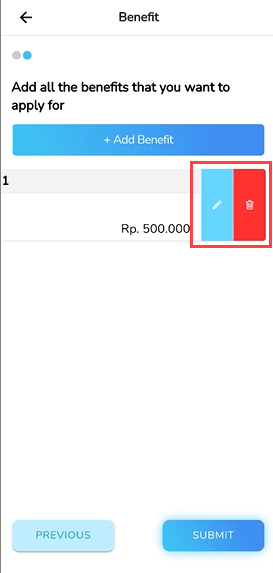
- For Change information details or delete list benefit, Swipe left for submission that you choose, click ikon edit or delete.
- If the application list is correct, click “Submit”.
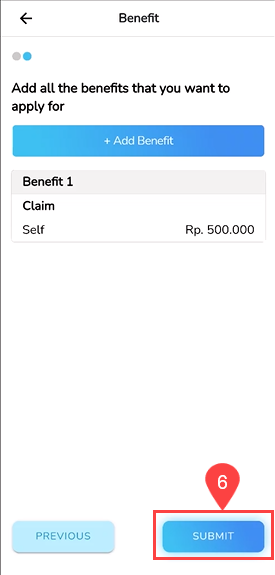
- Your Benefit Application submitted successfully.
2. Loan Application
For make a loan application on the StarConnect application, You can follow the following steps :
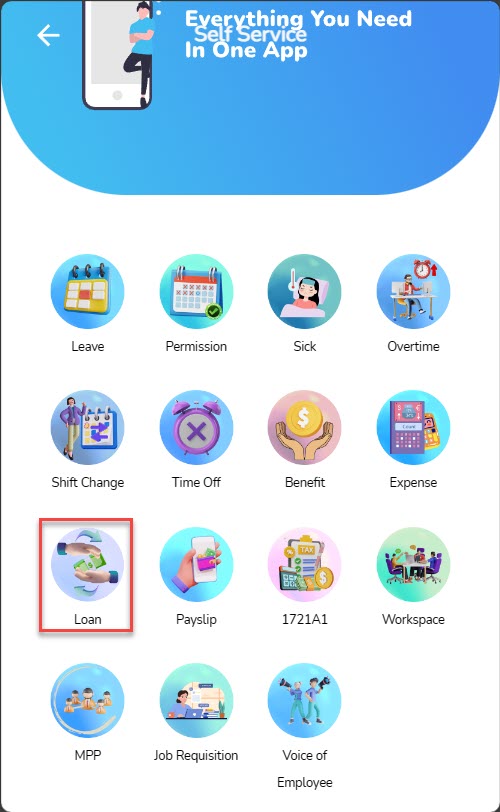
- On main page application, click menu Self Service.

- On Self Service page, choose Loan.
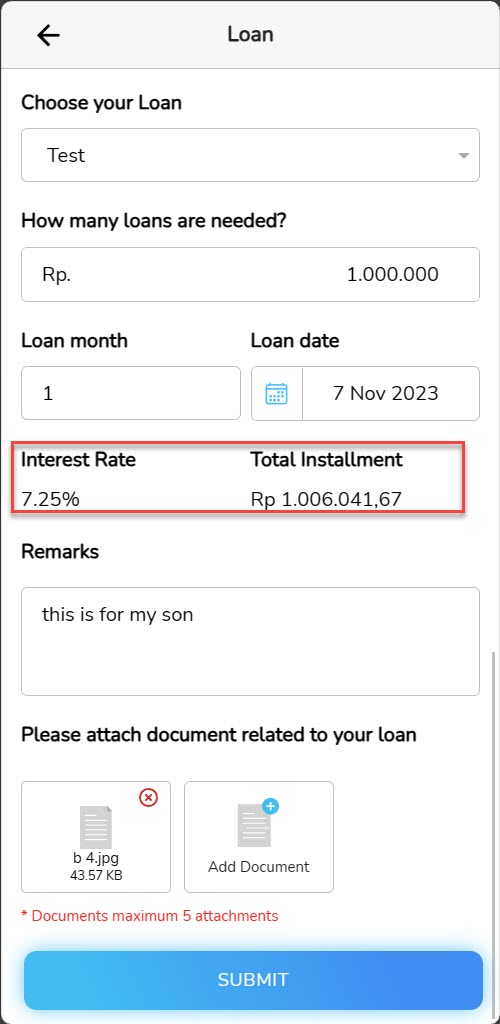
- On page form submission, fill in the application information you (Loan purpose, loan nominal, loan duration, loan date).
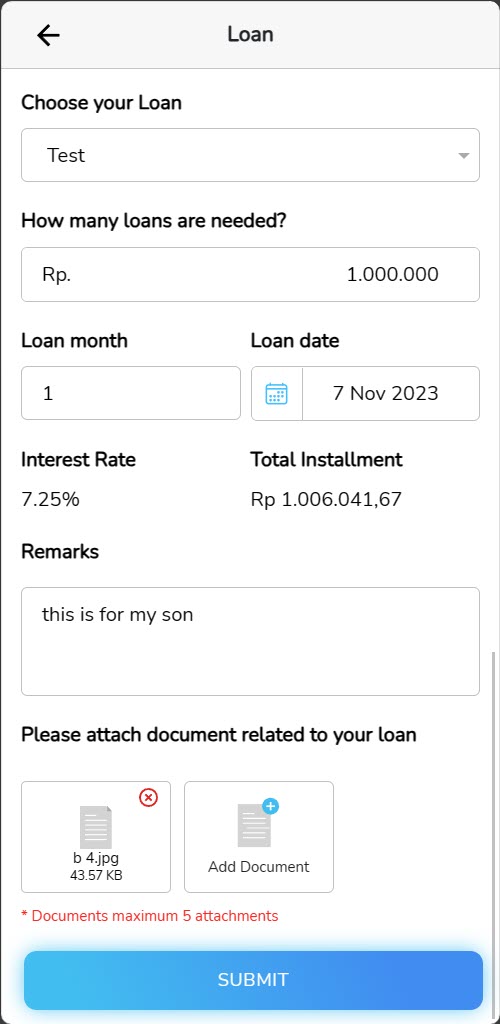
- After you enter the information above, the system will perform calculations automatically towards installments you.
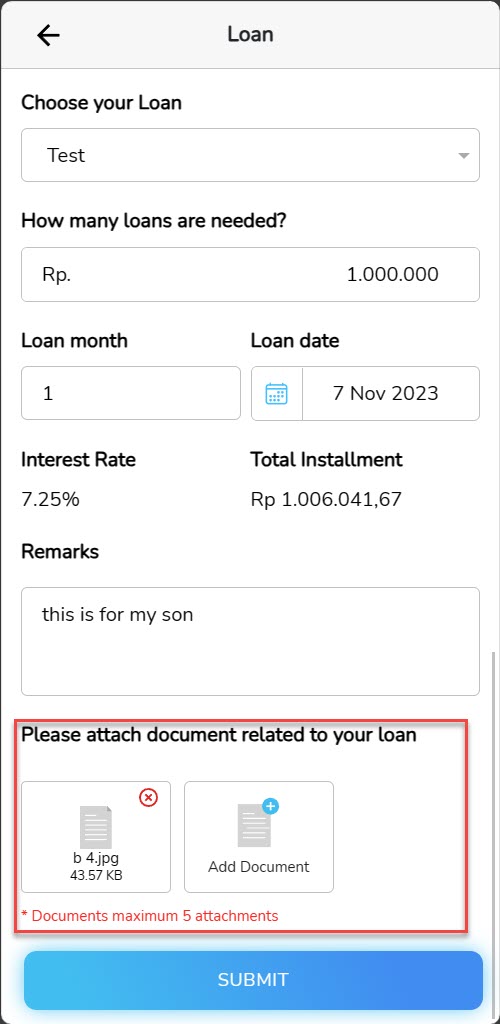
- Attach additional notes as well as supporting documents your application.
- Click “Submit”.
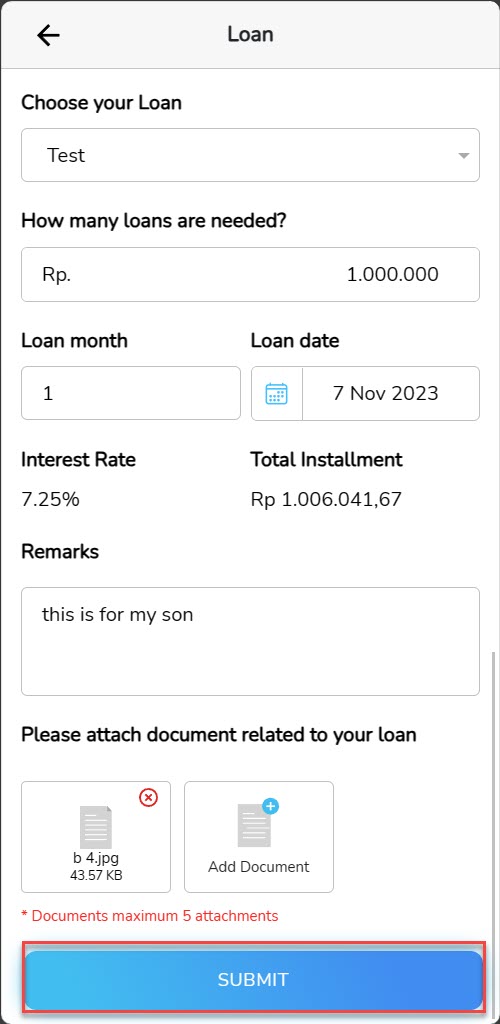
- Your Loan Application submitted successfully.
3. Submission of Expenses
For make an Expense application on the StarConnect application, You can follow the following steps :
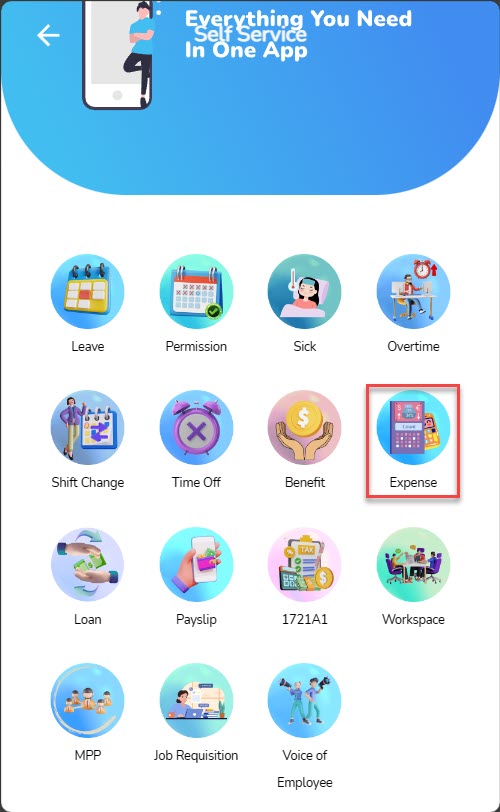
- On main page application, click menu Self Service.

- On Self Service page, choose Expense.
- On page form submission, Fill in the transaction date and category benefit that you want to submit.
- Attach additional notes as well as supporting documents your application (If there are).
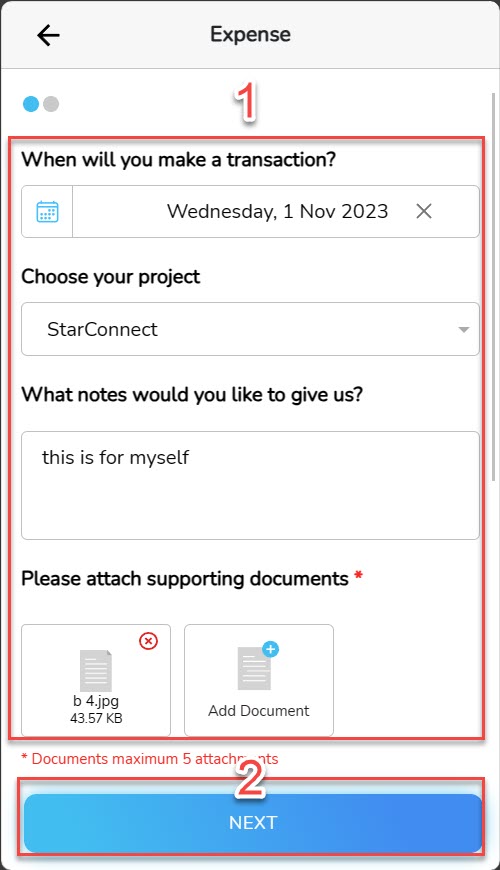
- Click “Next”.
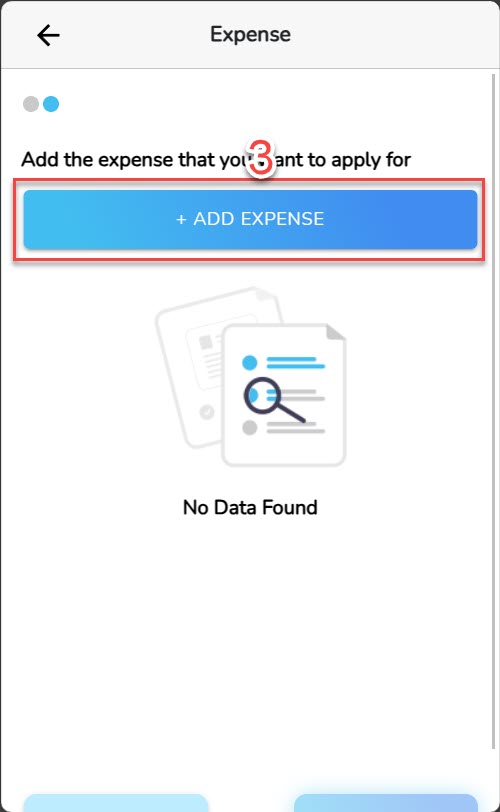
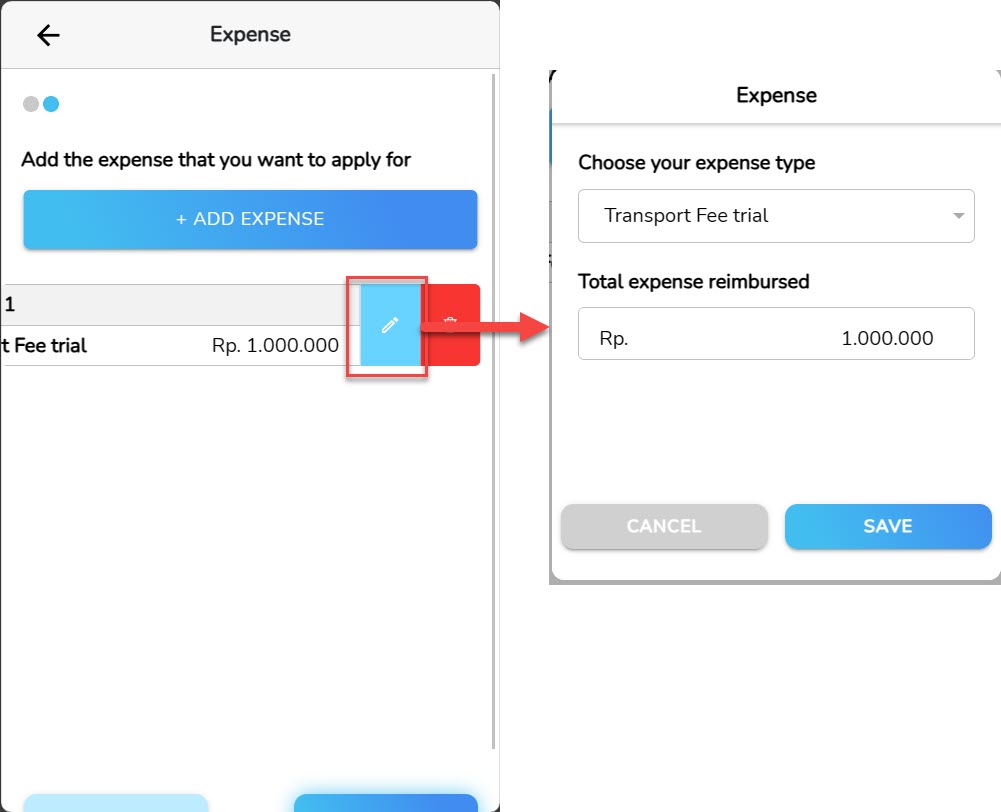
- Click “Add Expense”.
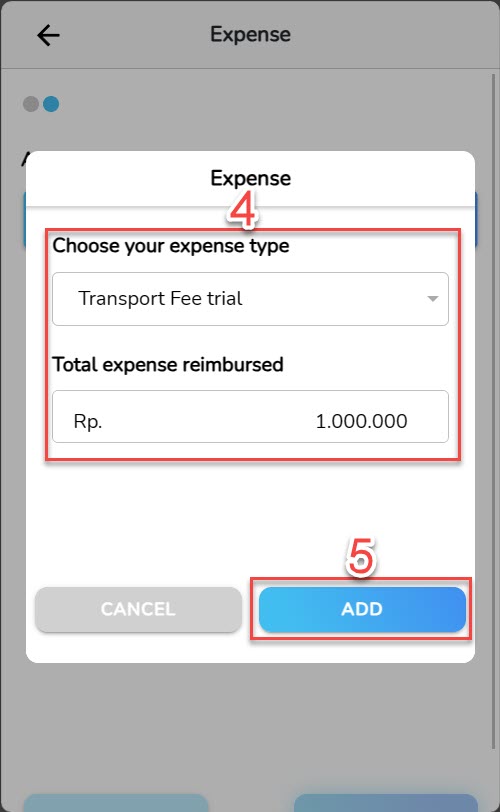
- On pop-up that appeared, add submission data you (Type and nominal expense submitted).
- Click “Add”.
📝Notes On pop-up This will display the limit expense that you can apply for.
- Expense added successfully to the list. To add to the submission list, You can repeat the steps above again.
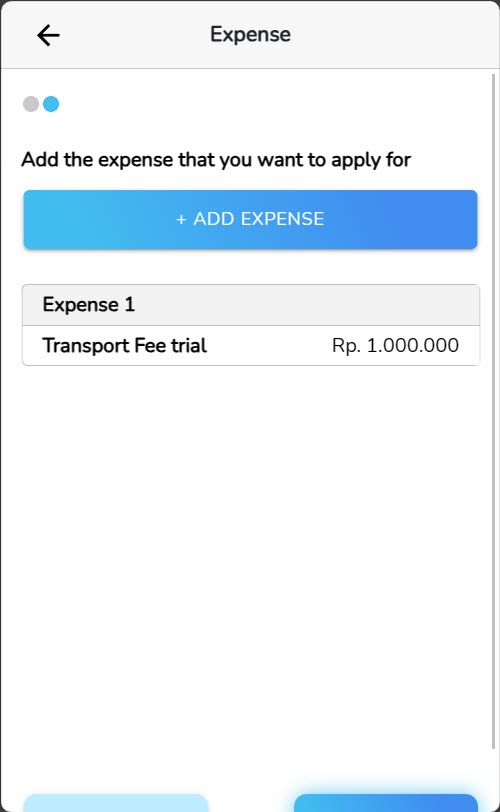
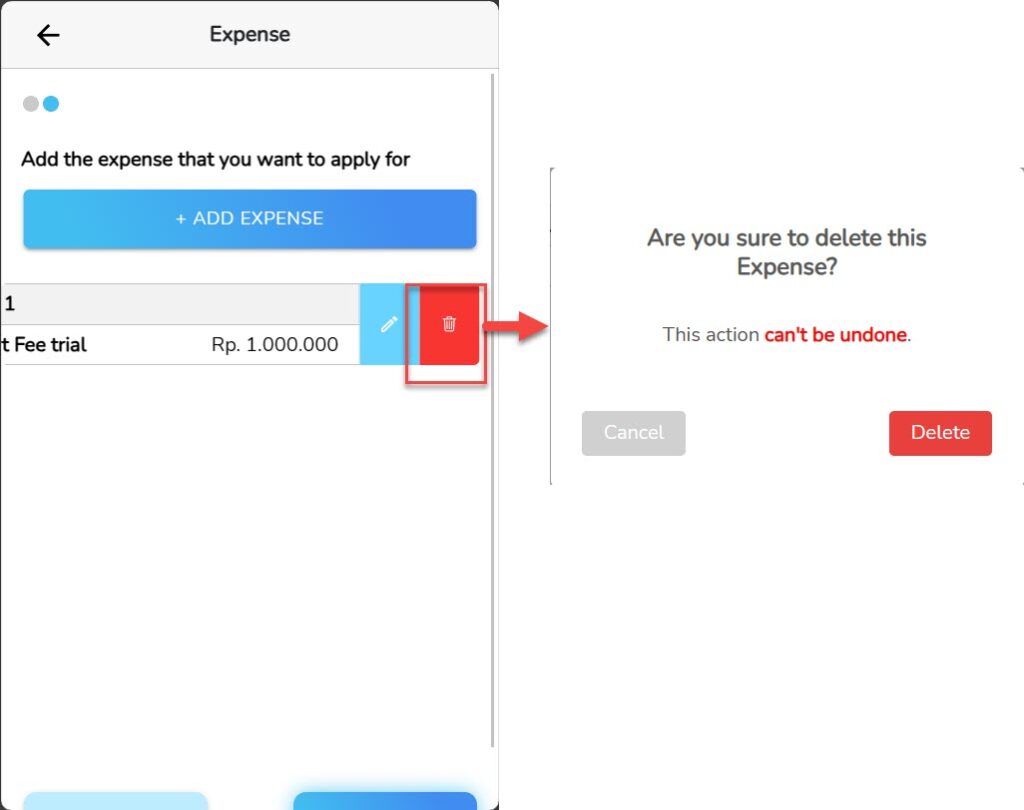
- For Change information details or delete list Expense, Swipe left for submission that you choose, click ikon edit or delete.
- If the application list is correct, click “Submit”.
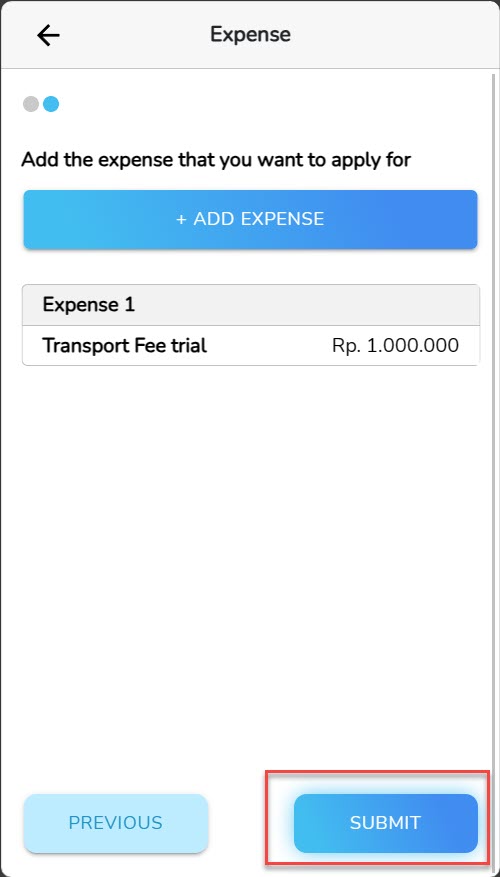
- Submitting Your Expenses submitted successfully.
Read Also :
– Approval of Submissions Submitted by Team Members
– Submission Status
– Self Service Submission – Check In/Out
– Self Service Submission – Absence
– Self Service Submission – Time