When you want create an element as a component in the payroll process which describes income type (earning), piece (deduction) given to employees, You can do that by following the steps below :
🔥IMPORTANT! It's worth paying attention to if you want create an element in the payroll process, make sure Element Classification on the Payroll menu has been made first.
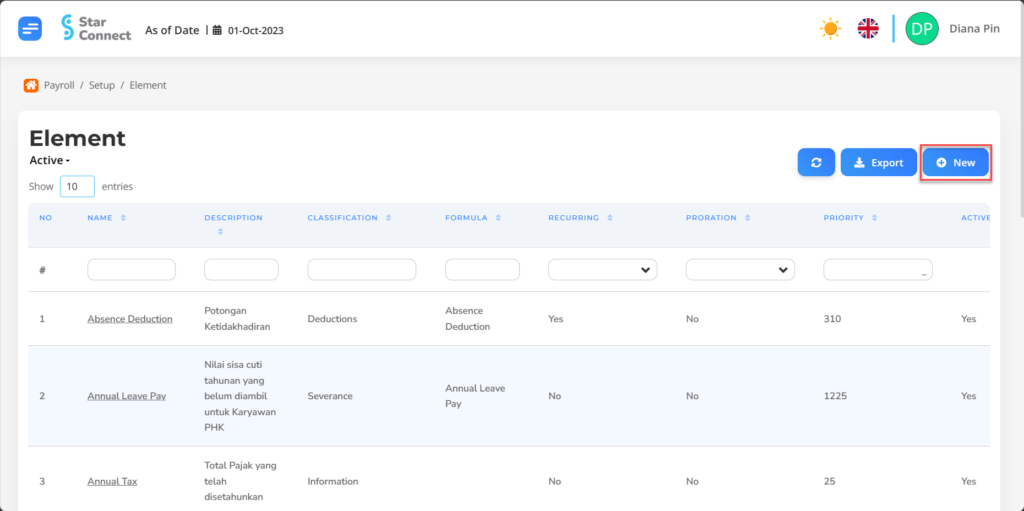
- On the Menu Payroll → Select Element.

- Click the button New to make an element.
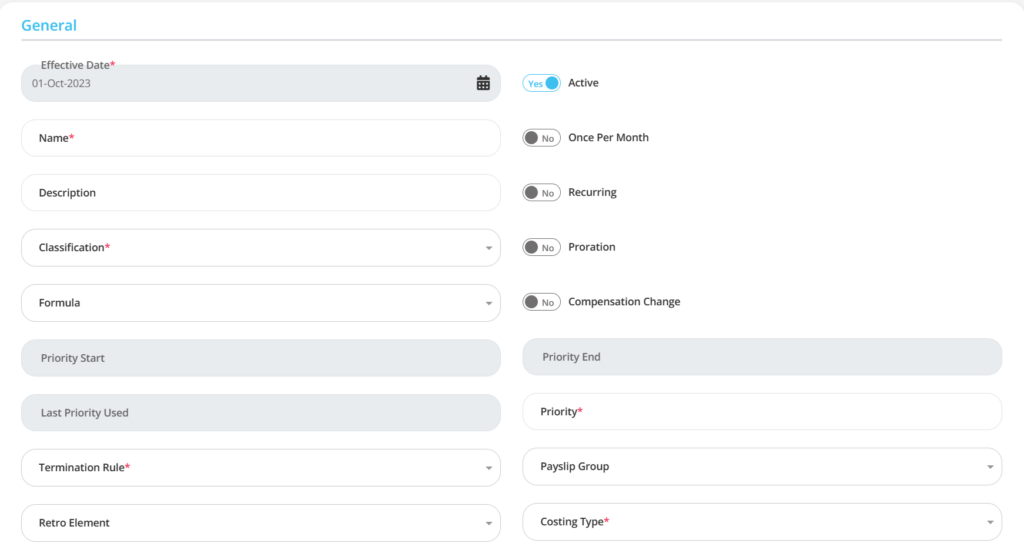
- Fill in the section General with the type of element you want to make.
| No | Feature | Information |
| 1 | Effective Date | It will automatically fill in after input As of Date previously. |
| 2 | Name | Filled with nama Element will be made. |
| 3 | Description | Filled with Element Description will be made. |
| 4 | Classification | Enter classification that is appropriate for the element to be made. |
| 5 | Formula | Enter calculation formula that is appropriate for the element to be made. |
| 6 | Priority Start | It will automatically fill in follow Classification Element the. |
| 7 | Last Priority Used | It will automatically fill in follow Classification Element the. |
| 8 | Termination Rule | Determine termination type from element : (related to the element to be processed for employees who stop) • Termination Date : Following the actual date of the employee stopped. • Pay Thru Date : The element can still be processed after the employee stops according to the pay thru date at-input di End Employment, Example : Bonus, THR, dll. |
| 9 | Retro Element | Enter nama element Retro/Rapel If the element concerned is an element that can be retro/in Rapel. |
| 10 | Active | • Click Yes, If the element is still active and processed in system. • Click No, If the element has been not active, then the element will be automatic lost in another menu. |
| 11 | Once per Month | • Click Yes, If the element processed once every month. • Click No, If the element can be processed more than once every month. |
| 12 | Recurring | • Click Yes, If the element processed every month. • Click No, If the element is only processed at a certain time/period. |
| 13 | Proration | • Click Yes, If the element is given prorate. • Click No, If the element is not given prorate. |
| 14 | Priority End | It will automatically fill in follow Classification Element the. |
| 15 | Priority | Filled with element priority level is processed. |
| 16 | Payslip Group | Enter the type Payslip Group to be registered on element. |
| 17 | Costing Type | Enter tipe Costing for the element. |
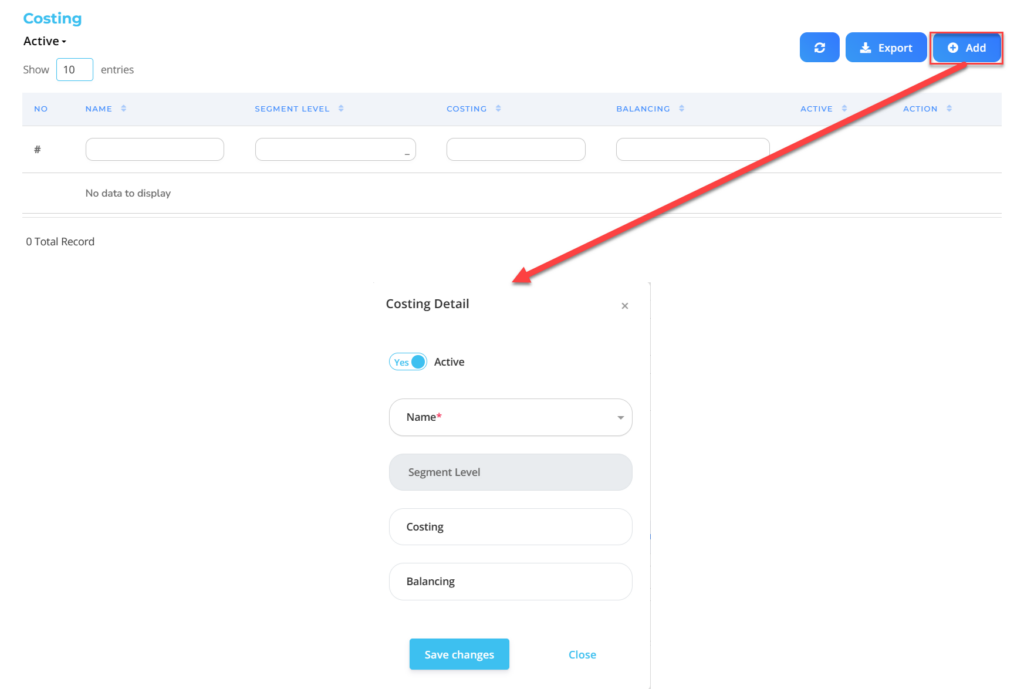
- In part Costing, click the button “Add”, Then fill in the data costing that will be at link by the company.
🔥IMPORTANT! It's worth paying attention to if you want Fill in data costing that will be at link by the company, make sure Chart of Accounts on the Payroll menu has been made first.
| No | Feature | Information |
| 1 | Active | • Click Yes, If the data costing element is still active and processed in system. • Click No, If the employee's data costing is already not active, then the data costing element will be automatic lost in another menu. |
| 2 | Name | Type filled nama Chart of Account which has been registered beforehand. |
| 3 | Segment Level | Automatically filled if filling the name that will be adjusted to the data Segment Level pada Chart of Account. |
| 4 | Costing | Menginput COA (Chart of Account) costing. |
| 5 | Balancing | Menginput COA (Chart of Account) balancing. |
Do save with a click button “Save Changes” in the detail costing section first, Then continue by filling in the completeness of other data elements.
- In part Element Value, click the button “Add”, Then fill in the amount of value to be entered into the element.

| No | Feature | Information |
| 1 | Effective Date | It will automatically fill in after input As of Date previously. |
| 2 | Sequence No | Choose sequence of element value which will appear in the results of the element process. |
| 3 | Value | Filled with nominal absolute for elements will be made. |
| 4 | Location Group | Filled with details Location Group that will be included in the element, in the form of LOV. |
| 5 | Job Family | Filled with details Job Family that will be included in the element, in the form of LOV. |
| 6 | Organization Level | Filled with details Organization Level that will be included in the element, in the form of LOV. |
| 7 | Position Level | Filled with details Position Level that will be included in the element, in the form of LOV. |
| 8 | Active | • Click Yes, If the detail element value for the element is still active and processed in system. • Click No, If the details of the element value for the element already not active, then the detailed data element value will be automatic lost in another menu. |
| 9 | Company | Filled with details Company that will be included in the element, in the form of LOV. |
| 10 | Grade | Filled with details Grade that will be included in the element, in the form of LOV. |
| 11 | Location | Filled with details Location that will be included in the element, in the form of LOV. |
| 12 | Job | Filled with details Job that will be included in the element, in the form of LOV. |
| 13 | Organization | Filled with details Organization that will be included in the element, in the form of LOV. |
| 14 | Position | Filled with details Position that will be included in the element, in the form of LOV. |
Do save with a click button “Save Changes” in the element value detailed section first, Then continue by filling in the completeness of other data elements.
- If you have entered all element information, then the final step is to do it save with a click button “Submit” At the bottom of the element page.