Menu employee can be used for make latest employee data, change employee data if there are changes, admin can too interesting all employee data that has been entered record by application.
In this section, You can learn :
1. How to create new employee data.
2. How to make changes to employee data.
1. How to Creating New Employee Data
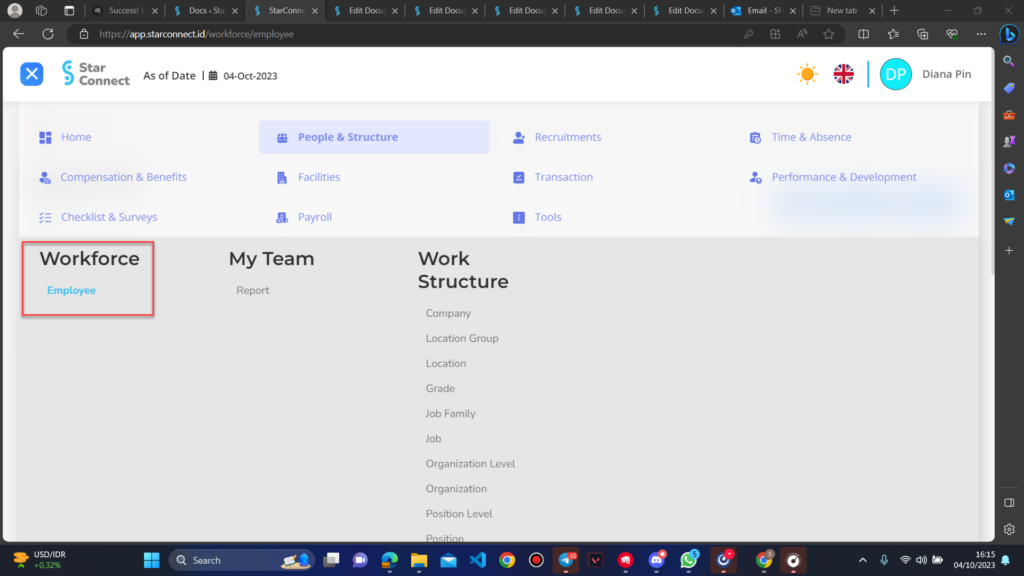
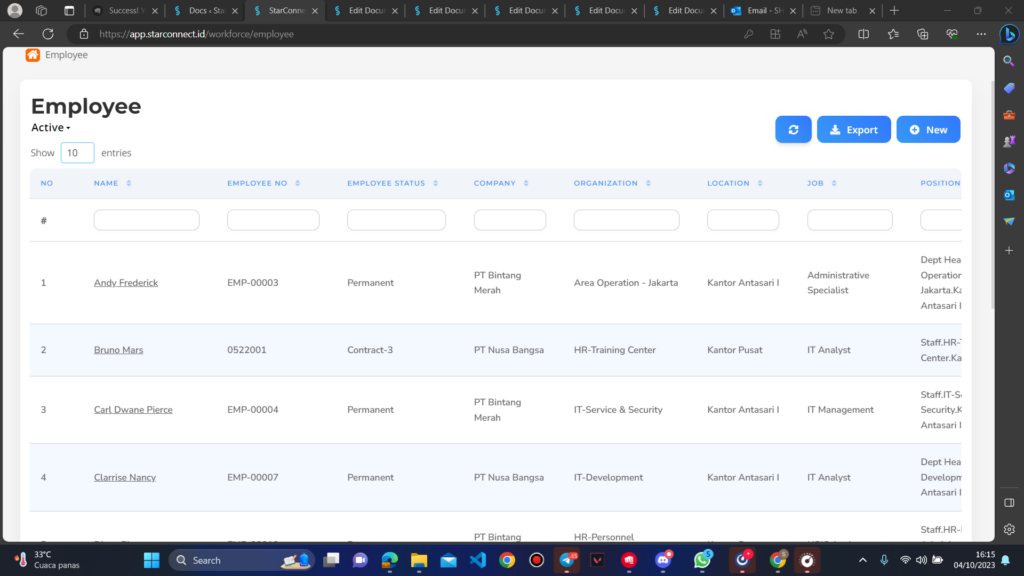
- Enter the menu Employee, then click the button Create.
- Ubah Effective Date in accordance with the effective date of the employee in hire.
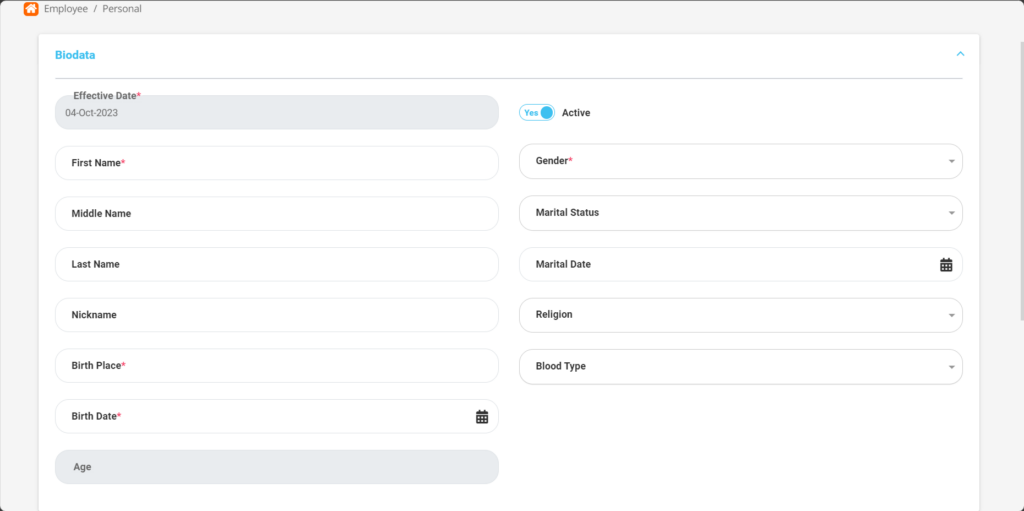
- Fill in the section “Biodata” with detailed employee biodata.
| No | Feature | Information |
|---|---|---|
| 1 | Effective Date | It will automatically be filled after input As of Date previously according to the employee's entry date. |
| 2 | First Name | Enter first name employee. |
| 3 | Middle Name | Enter middle name employee, when needed. |
| 4 | Last Name | Enter last name employee, when needed. |
| 5 | Nickname | Enter nickname employee, when needed. |
| 6 | Birth Place | Enter place of birth employee. |
| 7 | Birth Date | Enter date of birth employee. |
| 8 | Age | It will automatically fill in after input Birth Date. |
| 9 | Active | • Click Yes, if the employee is still active and processed in the system. • Click No, if the employee has not active, then the employee name will be automatically lost in another menu. |
| 10 | Gender | Enter gender employee, in the form of LOV. |
| 11 | Marital Status | Enter status employee, in the form of LOV. |
| 12 | Marital Date | Enter date of marital status employee if married. |
| 13 | Religion | Enter religion employee, in the form of LOV. |
| 14 | Blood Type | Enter blood group employee, in the form of LOV. |
- Fill in the “Contact Information” with detailed employee contact information.

| No | Feature | Information |
|---|---|---|
| 1 | Main phone | Enter mobile phone number employee. |
| 2 | Office mail | Enter work email employee. |
| 3 | Other phone | Enter home telephone number or Mobile phone other employees, If there are. |
| 4 | Personal mail | Enter personal email employee. |
- Fill in the “Identification Information” with detailed employee identification information.

| No | Feature | Information |
|---|---|---|
| 1 | National ID | Enter identity number employee. |
| 2 | Family card number | Enter family card number employee. |
| 3 | Employee tax number | Enter personal NPWP number employee. |
| 4 | BPJS TK number | Enter BPJS Employment number employee. |
| 5 | BPJS Health Number | Enter BPJS Health number employee. |
| 6 | Insurance Number | Input Insurance number employee |
- Fill in the “Tax Information” with detailed employee tax information.

| No | Feature | Information |
|---|---|---|
| 1 | Tax type | Enter tax type officer (Local, Expatriate, Honorarium, Consultant, Pensioner, dll), in the form of LOV. |
| 2 | Tax marital status | Enter marital status officer (S0, S1, S2, S3, M0, M1, M2, M3) as a basis for PTKP calculations, in the form of LOV. |
- Fill in the “Bank Information” with detailed employee bank information.

| No | Feature | Information |
|---|---|---|
| 1 | Bank | Enter bank name which will be used for employees, in the form of LOV. |
| 2 | Account number | Enter personal account number employee. |
| 3 | Branch name | Enter name of the city of the bank branch that employees use. |
| 4 | Account name | Input account owner name the. |
- Fill in the “Employment” with detailed employee information.

| No | Feature | Information |
|---|---|---|
| 1 | Effective date | It will automatically fill in after input The previous Effective Date corresponds to the employee's entry date. |
| 2 | Company | Input company name where employees work. |
| 3 | Employee number | It will automatically fill in Employee NIK. |
| 4 | Active | • Click Yes, if data employment the employee still active and processed in the system. • Click No, if data employment the employee already not active, then the employee name will be automatically lost in another menu. |
| 5 | Enterprise hire date | Containing date of first employee entry in the group of companies. |
| 6 | Company hire date | It will automatically fill in after input As of Date or the date the employee joined the company where he/she currently works. |
- In part “Contract Information” :

| No | Feature | Information |
|---|---|---|
| 1 | Type | Enter status employee, example: Contract, Internship, Permanent, Probation, and others, in the form of LOV. |
| 2 | Period start | Enter start date the validity of employee status. |
| 3 | Period end | Enter end date the validity of employee status. |
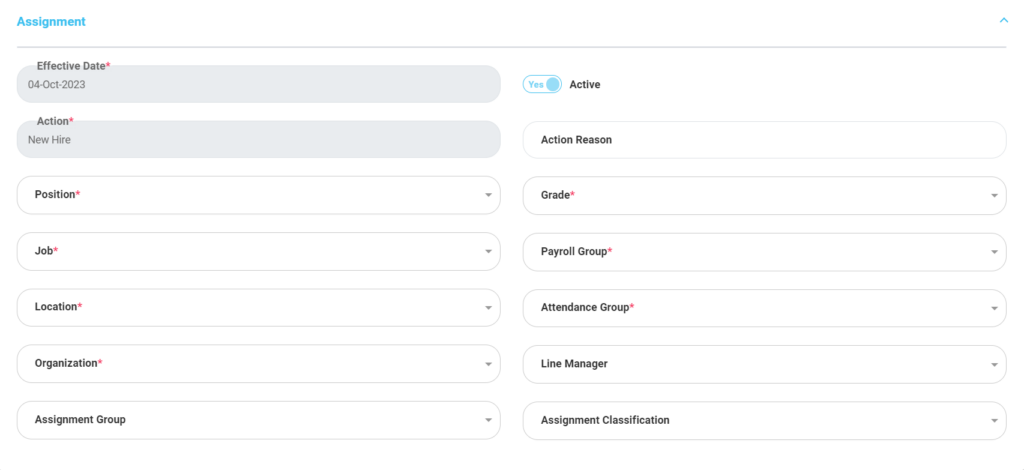
- In part “Assignment” :
| No | Feature | Information |
|---|---|---|
| 1 | Effective Date | It will automatically be filled after input As of Date previously according to the employee's entry date. |
| 2 | Action | It will automatically fill in new hire. |
| 3 | Position | Enter employee position, in the form of LOV. |
| 4 | Job | Enter Employee jobs, in the form of LOV. |
| 5 | Location | Enter employee work location, in the form of LOV. |
| 6 | Organization | Enter organization where the employee is placed, in the form of LOV. |
| 7 | Assignment Group | Enter payroll group employees in the form of LOV. |
| 8 | Active | • Click Yes, if data assignment the employee still active and processed in the system. • Click No, if data assignment the employee already not active, then the employee name will be automatically lost in another menu. |
| 9 | Action Reason | Enter reason If data assignment employee still active/no longer active, If there are. |
| 10 | Grade | Enter Grade employee, in the form of LOV. |
| 11 | Payroll Group | Enter Payroll Group employee, in the form of LOV. |
| 12 | Attendance Group | Enter entry schedule appropriate employees Attendance Group which has been made, in the form of LOV. |
| 13 | Line Manager | Enter manager which will cover the employees of the company. |
| 14 | Assignment Classification | Input type of employee work classification, example: Back Office, Front Office, Middle office, in the form of LOV. |
- Do save with a click button “Submit” at the end of the Employee page.
2. How to Making Changes to Employee Data
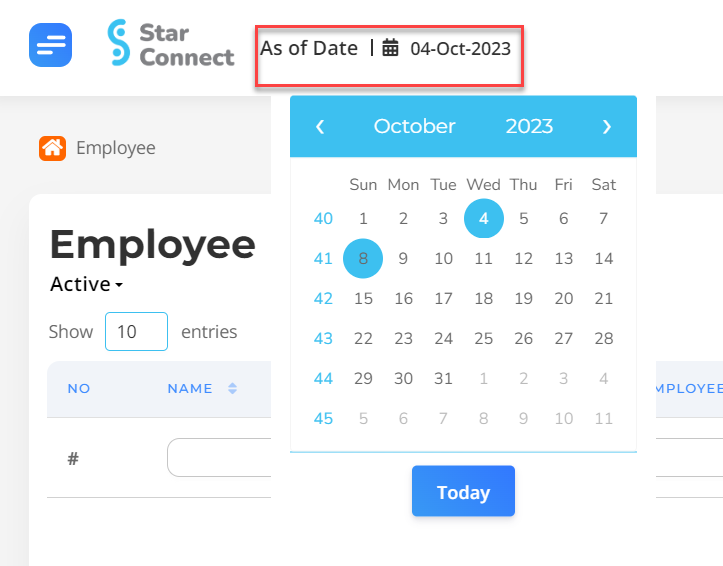
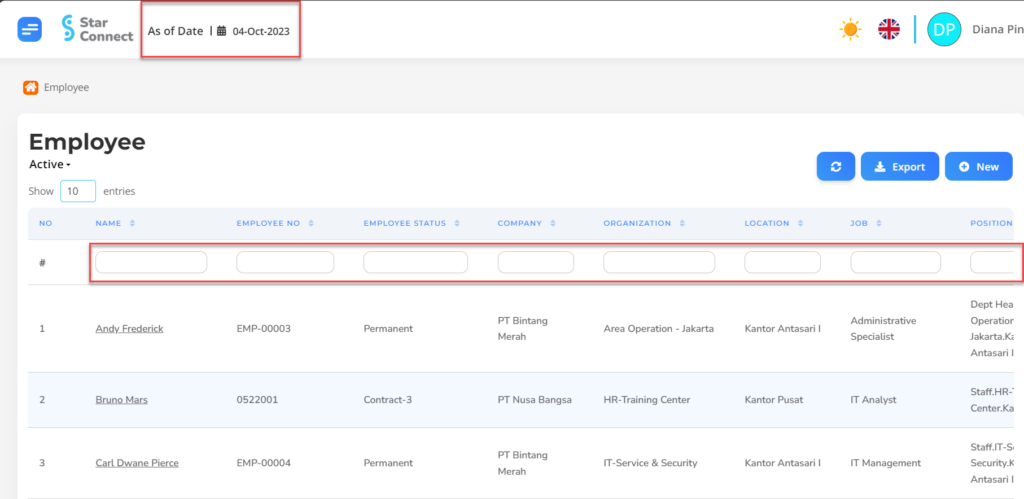
- Enter the menu Employee, then click As of Date to change according to the effective date of changes to employee data.
- Select one to search for changed employee data
- Enter changes to employee data according to the correct data
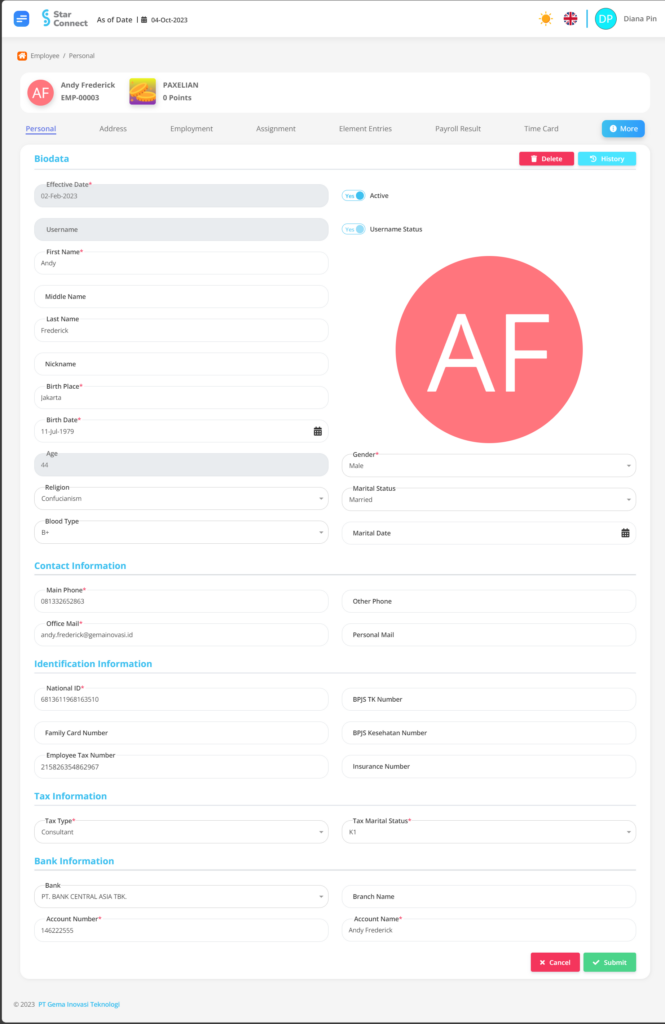
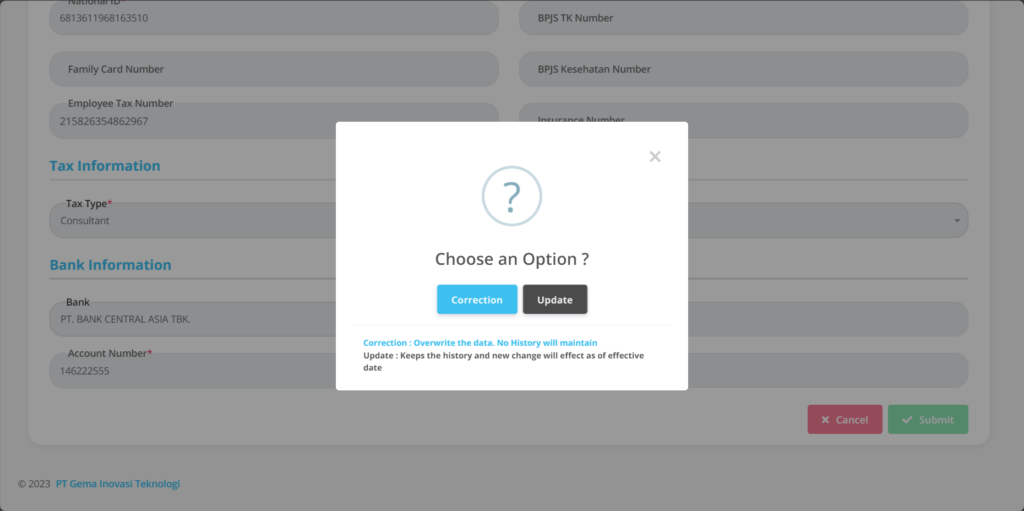
- Do save with a click button “Submit” on the page where changes have been made, then when submitting data there will be a pop up containing “Correction & Update”.
• Done Correction if you want correcting user errorsinputand on employee data.
• Done Update if you want update data employee.
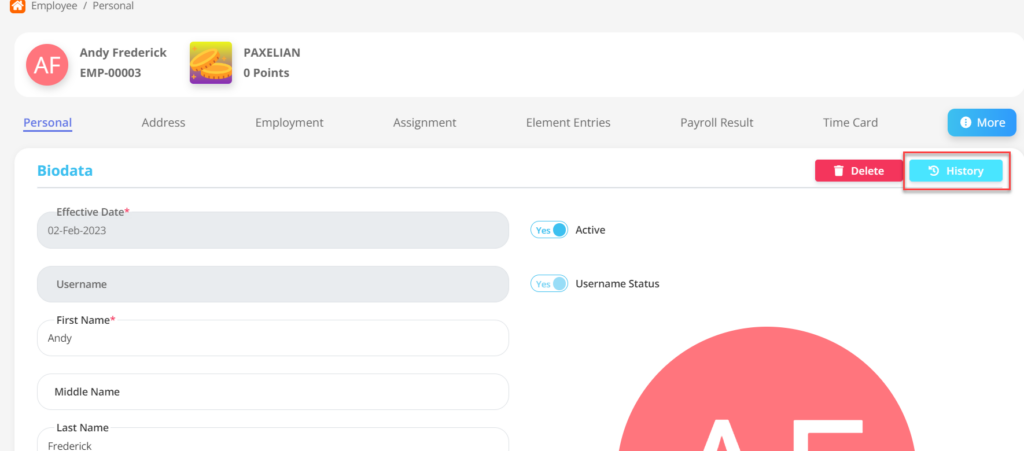
- If you want to see results of data changes to your employees input, You can click the button “History” which can be used to view specific data.
