When you want Determine access rights whatever is obtained by user certain, You can use Users on the security menu by following the following steps :
🔥IMPORTANT! It's worth paying attention to if you want Determine access rights user certain, make sure You have been Registering the access rights in a role by using Roles on the security menu.
- On the Menu Security → Select Users.
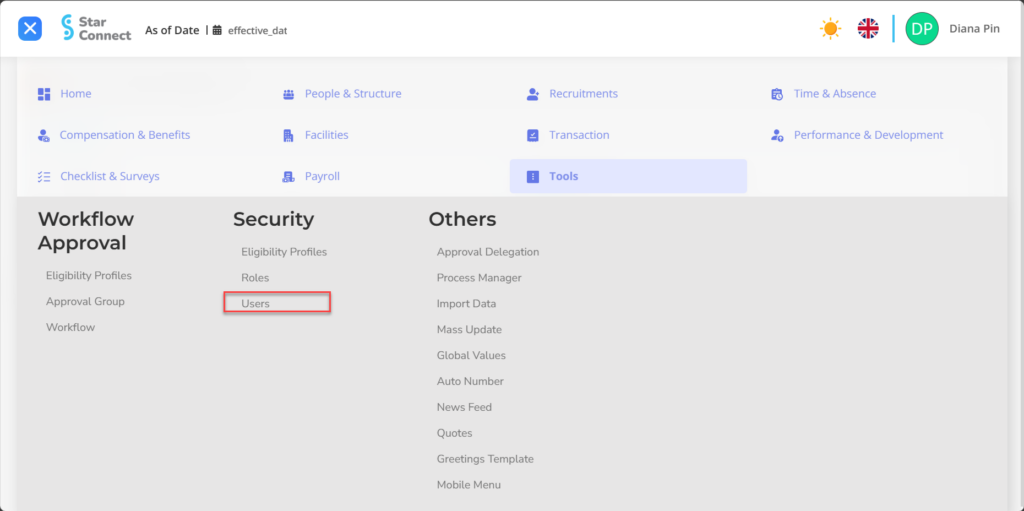
- Click one username, Or you can also look for it in the "column"Search Records”First.

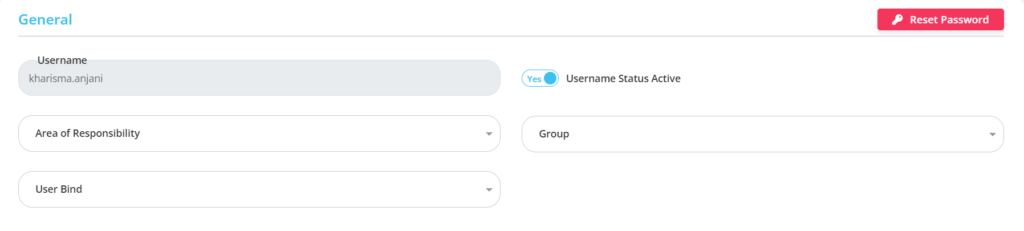
- Fill in the section General with the area of responsibility user the.
🔥IMPORTANT! It's worth paying attention to if you want determine the area of responsibility user certain, make sure You have been make employee grouping by using Eligibility Profiles on the security menu.
📝Notes
On this page, You can also reset passwords for user the, by clicking the button “Reset Password” the password will automatically change to the beginning.
| No | Feature | Information |
| 1 | Username | Automatically filled After selecting User previously. |
| 2 | Area of Responsibility | Enter Area of Responsibility for the user. |
| 3 | Username Status Active | • Click Yes, If the user is still active and processed in system. • Click No, If the user has not active, then the user will be automatic lost in another menu. |
| 4 | User Bind | Used if the user can access 2 user at once through the user switch on starconnect |
| 5 | Group | Enter Group to enter the user into the grouping of access rights. |
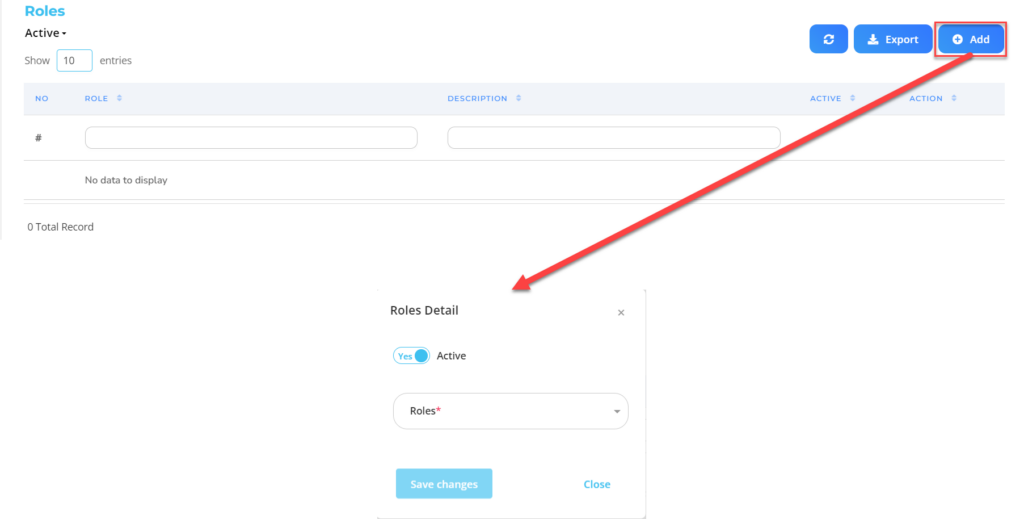
- In part Roles, click the button “Add”, Then fill in with access rights in the form of what roles can be accessed by the user.
| No | Feature | Information |
| 1 | Active | • Click Yes, If the type of roles is still active and processed in system. • Click No, If the type of role is already not active, then the type of roles will be automatic lost in another menu. |
| 2 | Roles | Enter access rights For users. |
Do save with a click button “Save Changes” in the detailed roles first, Then continue by filling in the completeness of other users data.
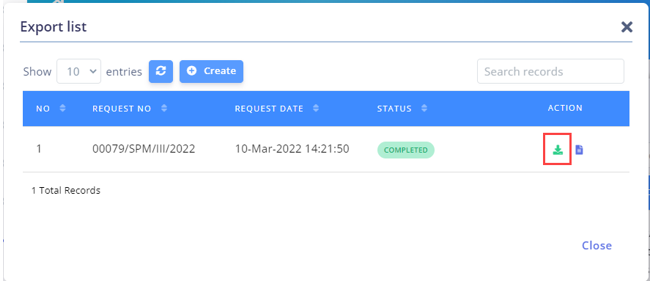
- In part Login History, by clicking the button “Export” Then “Create”, the system will automatically process the history login by the user.
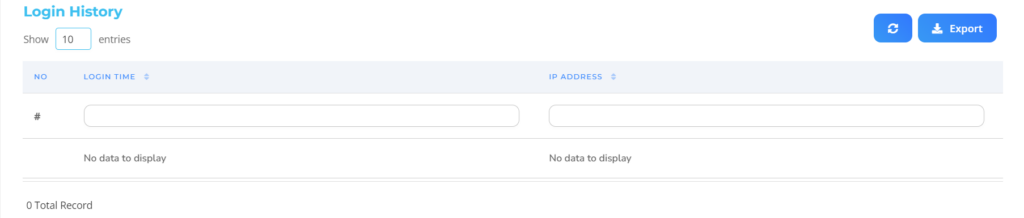
- If you want to men-download the results of the history login that has been created, You can click the button “Download” In the section "Action” on the export list page.
📝Notes
Before you men-download results output, Make sure the section “Status” has changed to “Completed”.
Read Also :
– How to Group Employees for Access Rights Purposes
– How to Register Access Rights for Certain Roles