Employee grouping for needs licensing determined based on level / his level.
Employee grouping for licensing is divided into 2, namely the grouping of employees who can submit licensing or called Eligibility Profile, and grouping of employees who have authority to agree / Reject licensing or what is called Approval Group.
In this section, You can learn :
1. How to make an eligibility profile.
2. How to make an approval group.
1. How to Make Eligibility Profile.
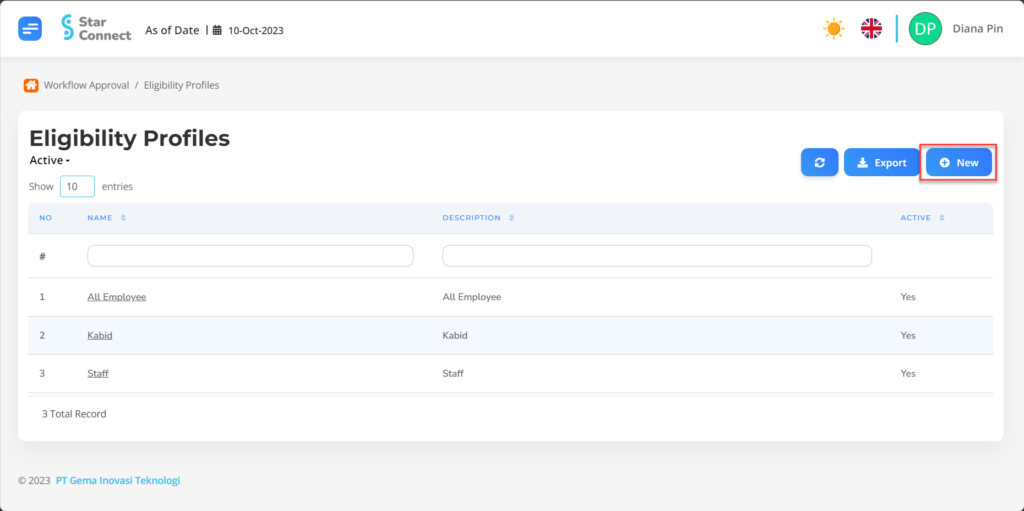
- On the Menu Workflow Approval → Select Eligibility Profiles.

- Click the button New To register Eligibility Profile.
- Fill in the section General with the eligibility profile you want to display.

| No | Feature | Information |
| 1 | Name | Filled with no Eligibility Profile. |
| 2 | Description | Filled with description Eligibility Profile. |
| 3 | Active | • Click Yes, If the eligibility profile is still active and processed in system. • Click No, If the Eligibility Profile has not active, then the name Eligibility Profile will be automatic lost in another menu. |
- In part Criteria, choose Add Then fill in the criteria that will use approval/licensing according to the criteria.

| No | Feature | Information |
| 1 | Active | • Click Yes, If the approval criteria are still active and processed in system. • Click No, If the approval criteria have been not active, then the approval criteria will be automatic lost in another menu. |
| 2 | Marital Status | Enter status employee, in the form of LOV. |
| 3 | Age | Enter age employee, in the form of LOV. |
| 4 | Location Group | Enter Work group location employee, in the form of LOV. |
| 5 | Job Family | Enter Job Family employee, in the form of LOV. |
| 6 | Organization Level | Enter level organization where the employee is placed, in the form of LOV. |
| 7 | Position Level | Enter level position employee, in the form of LOV. |
| 8 | Grade | Enter Grade employee, in the form of LOV. |
| 9 | Employment Type | Enter contract type employee, in the form of LOV. |
| 10 | Gender | Enter gender employee, in the form of LOV. |
| 11 | Religion | Enter religion employee, in the form of LOV. |
| 12 | Company | Enter Company employee, in the form of LOV. |
| 13 | Location | Enter work location employee, in the form of LOV. |
| 14 | Job | Enter Job employee, in the form of LOV. |
| 15 | Organization | Enter organization where the employee is placed, in the form of LOV. |
| 16 | Position | Enter position employee, in the form of LOV. |
| 17 | Length Of Service | Enter if the apprrror is only applied to employees with work time certain. |
| 18 | Payroll | Enter Payroll Group employee, in the form of LOV. |
Do save with a click button “Save Changes” in the criteria section first, Then continue by filling in the completeness of other eligibility data profiles.
- If you have entered all the Eligibility Profile information, then the final step is to do it save with a click button “Submit” At the bottom of the Eligibility Profile page.
2. How to Make approval groups.
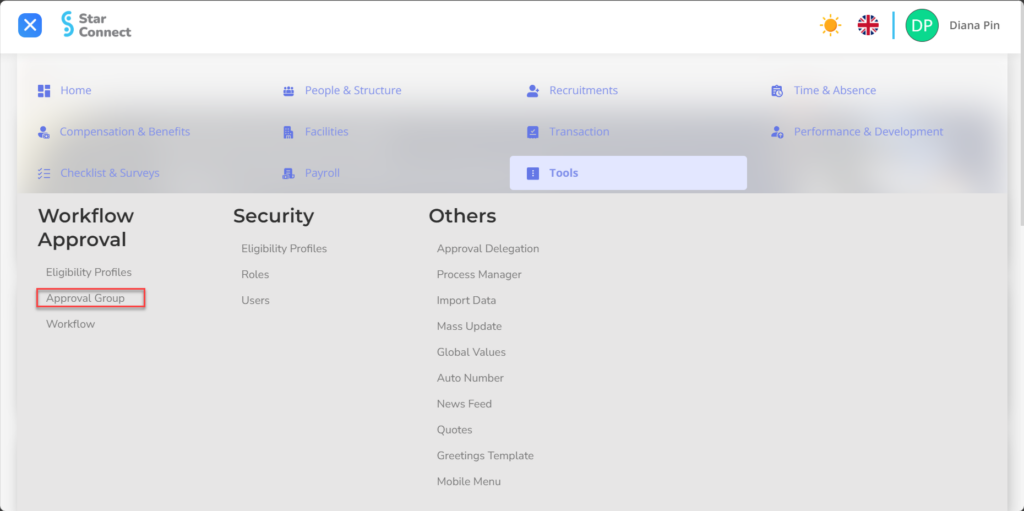
- On the Menu Workflow Approval → Select Approval Group.
- Click the button New To register Approval Group.
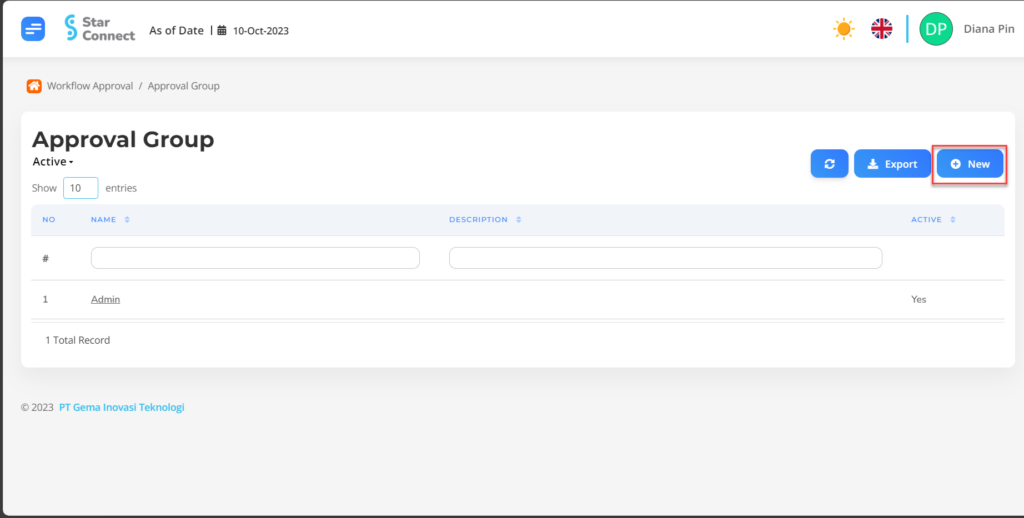
- Fill in the section General with the approval group that you want to display.

| No | Feature | Information |
| 1 | Name | Filled with no Approval Group. |
| 2 | Description | Filled with description Approval Group. |
| 3 | Active | • Click Yes, if the Approval Group is still active and processed in system. • Click No, if the Approval Group is complete not active, then the Approval Group name will be automatic lost in another menu. |
- In part Employees, choose Add then select the employee by clicking the sign “✓” Besides the name of the employee who will approve/licensing the Approval Group list.
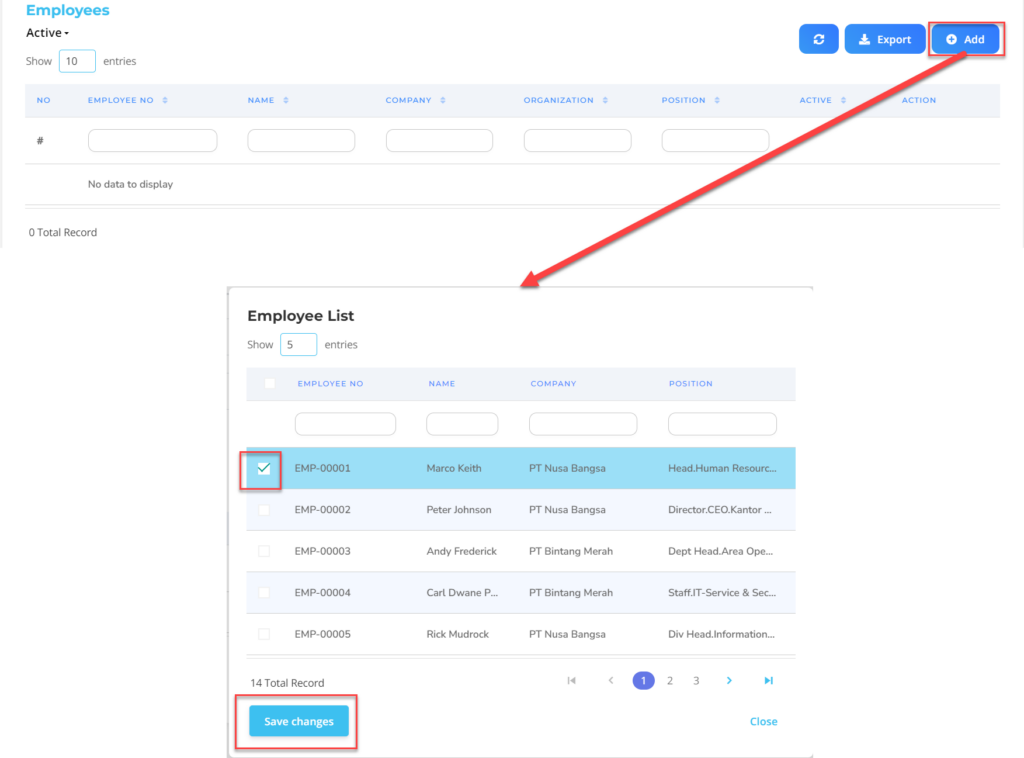
Do save with a click button “Save Changes” In each part first, Then continue by filling in the completeness of other approval group data.
- If you have entered all the Approval Group information, then the final step is to do it save with a click button “Submit” At the bottom of the Approval Group page.
Read Also :
– How to Group Workflow for Licensing Needs