If you want register targets or goals that will be achieved by the company into the system, You must create employee grouping types for target types said first.
Registration of employee grouping types for target or goal types can be created with Eligibility Profiles on the Goal Menu, and registration of targets or goals can be made using Goal Library on the Goal Menu.
In this section, You can learn :
1. How to create Eligibility Profiles.
2. How to create a Goal Library.
1. How to Create Eligibility Profiles.
- On the Menu Goal → Select Eligibility Profiles.

- Click the button New to register Eligibility Profiles on the Goal menu.
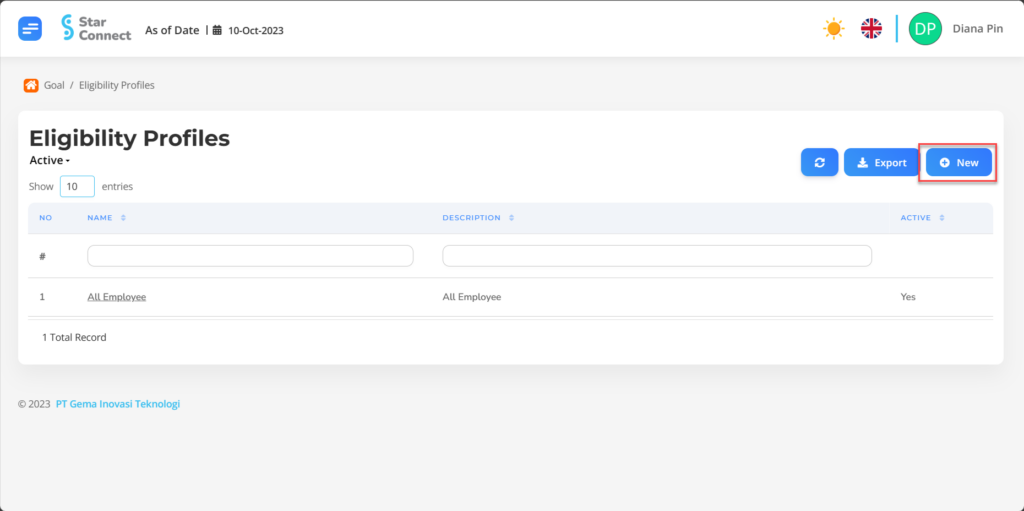
- In part General, isi with the type of Eligibility Profiles you want to display.

| No | Feature | Information |
| 1 | Name | Filled with no Eligibility Profiles. |
| 2 | Description | Filled with description Eligibility Profiles. |
| 3 | Active | • Click Yes, if the Eligibility Profiles type is still active and processed in system. • Click No, if the Eligibility Profiles type is already in place not active, then the Eligibility Profiles type will be automatic lost in another menu. |
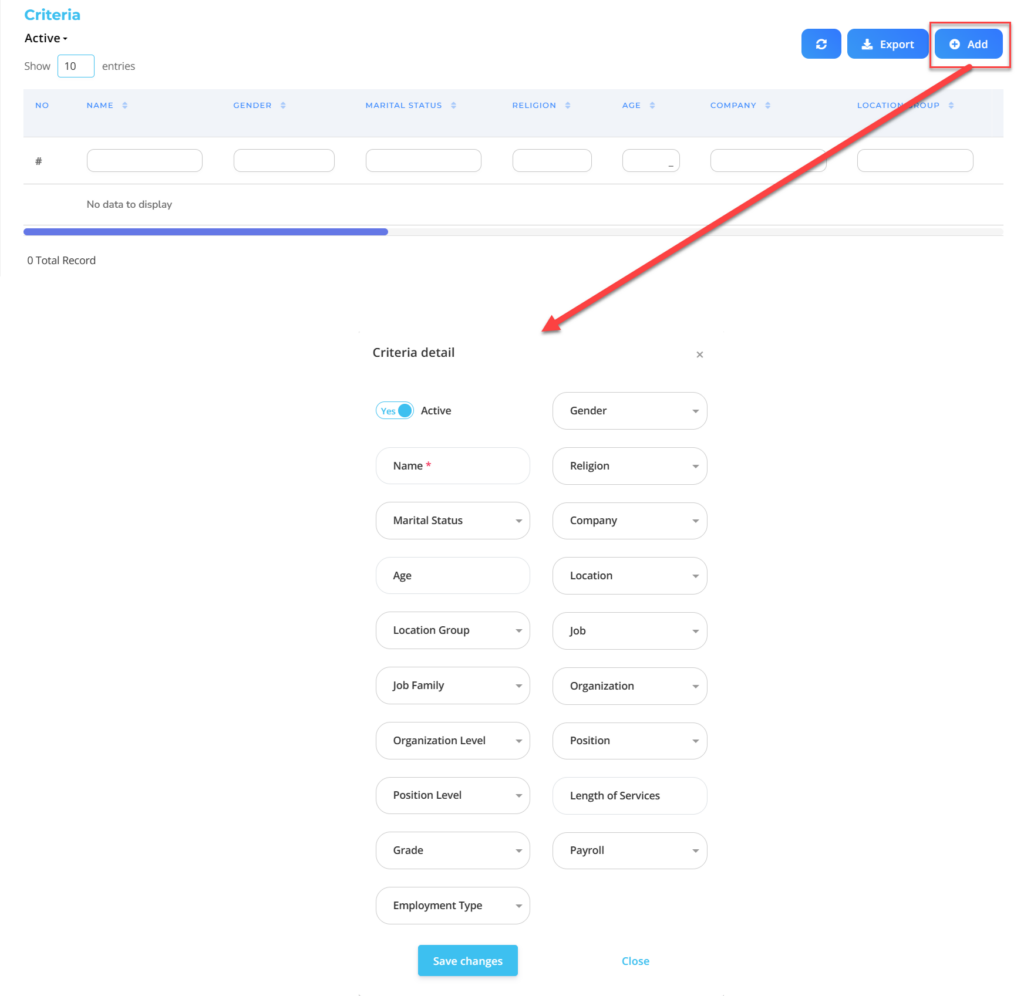
- In part Criteria, click the button “Add”, and continue by filling in the employee criteria for which targets or goals will be determined.
| No | Feature | Information |
| 1 | Active | • Click Yes, if the detailed Eligibility Profile for the Goal is still active and processed in system. • Click No, if the Eligibility Profile details for the Goal are complete not active, then the detailed Eligibility Profile data for the Goal will be automatic lost in another menu. |
| 2 | Name | Filled no Eligibility Profile for grouping company goals. |
| 3 | Marital Status | Filled with details marital status which will be included in the Eligibility Profile. |
| 4 | Age | Filled with details age which will be included in the Eligibility Profile. |
| 5 | Location Group | Filled with details Location Group which will be included in the Eligibility Profile, in the form of LOV. |
| 6 | Job Family | Filled with details Job Family which will be included in the Eligibility Profile, in the form of LOV. |
| 7 | Organization Level | Filled with details Organization Level which will be included in the Eligibility Profile, in the form of LOV. |
| 8 | Position Level | Filled with details Position Level which will be included in the Eligibility Profile, in the form of LOV. |
| 9 | Grade | Filled with details Grade which will be included in the Eligibility Profile, in the form of LOV. |
| 10 | Employment Type | Filled with details Employment Type which will be included in the Eligibility Profile, in the form of LOV. |
| 11 | Gender | Filled with details gender which will be included in the Eligibility Profile, in the form of LOV. |
| 12 | Religion | Filled with details religion which will be included in the Eligibility Profile, in the form of LOV. |
| 13 | Company | Filled with details Company which will be included in the Eligibility Profile, in the form of LOV. |
| 14 | Location | Filled with details Location which will be included in the Eligibility Profile, in the form of LOV. |
| 15 | Job | Filled with details Job which will be included in the Eligibility Profile, in the form of LOV. |
| 16 | Organization | Filled with details Organization which will be included in the Eligibility Profile, in the form of LOV. |
| 17 | Position | Filled with details Position which will be included in the Eligibility Profile, in the form of LOV. |
| 18 | Length of Services | Filled with details minimum working hours Eligible employees are included in the Eligibility Profile, in the form of LOV. |
| 19 | Payroll | Filled with details Payroll which will be included in the Eligibility Profile, in the form of LOV. |
Do save with a click button “Save Changes” in the detailed Criteria section first, then continue by filling in the other complete Eligibility Profiles data.
- If you have entered all the Eligibility Profiles information, then the final step is to do it save with a click button “Submit” at the very bottom of the Eligibility Profiles page.
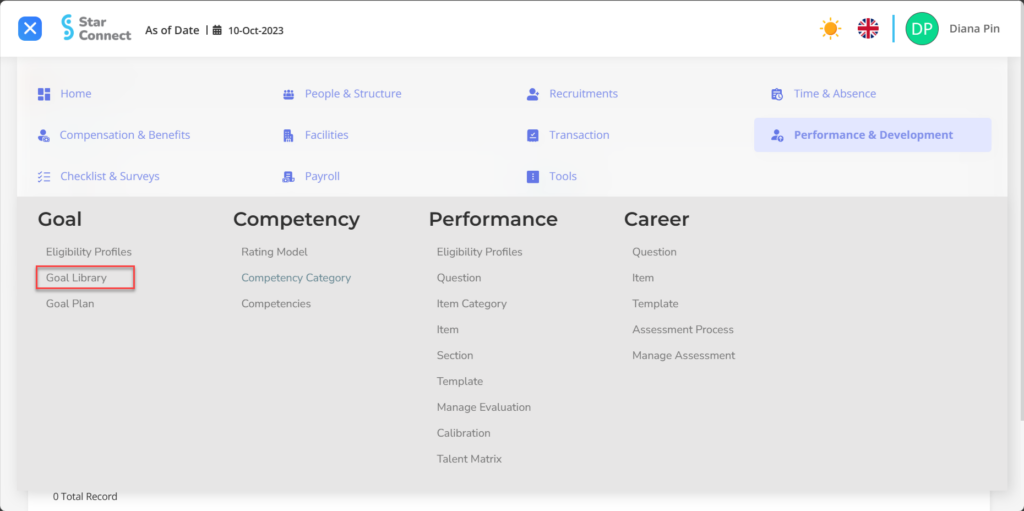
2. How to Create a Goal Library.
- On the Menu Goal → Select Goal Library.
- Click the button New to register the Goal Library on the Goal menu.
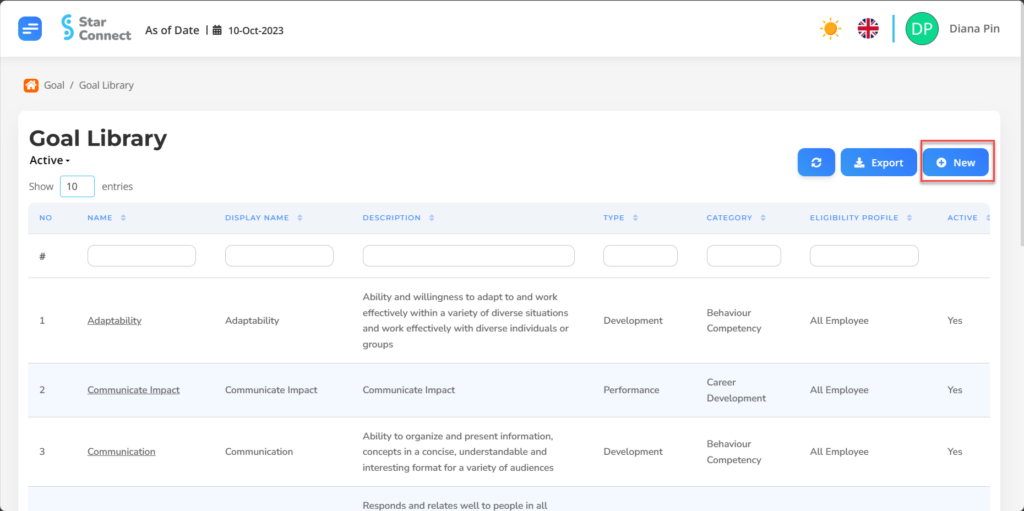
- In part General, isi with the type of Goal Library you want to display.
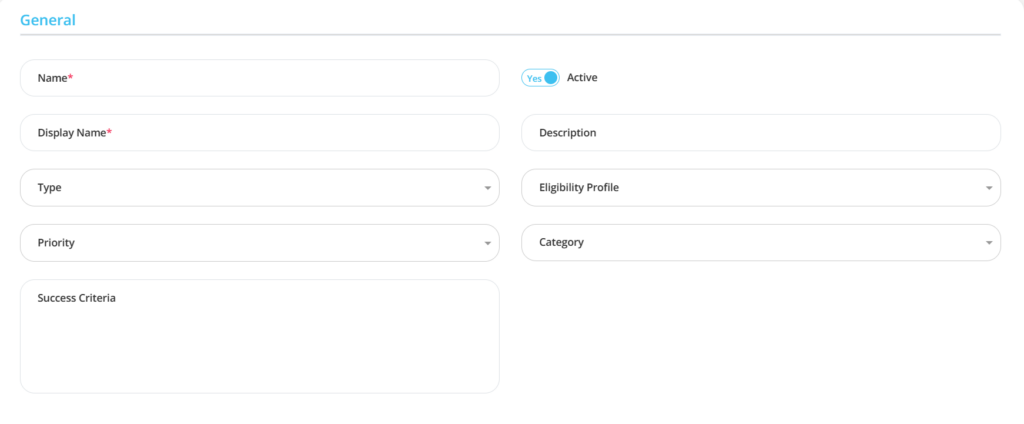
| No | Feature | Information |
| 1 | Name | Filled with no Goal Library. |
| 2 | Display Name | Filled with no which will appear on the Goal Library page. |
| 3 | Type | Filled with type of the Goal to be achieved. Example: Competence, dll. |
| 4 | Priority | Filled with priority level in achieving this goal. Example: High, dll. |
| 5 | Success Criteria | Filled with criteria needed to achieve that goal. |
| 6 | Active | • Click Yes, if the goal is still active and processed in system. • Click No, if Goal is already not active, then the goal will be automatic lost in another menu. |
| 7 | Description | Filled with description That goal. |
| 8 | Eligibility Profile | Filled with groupings Eligibility Profile employees who will achieve these goals. |
| 9 | Category | Filled with category Goal. Example: Career Development. |
- In part Outcomes, click the button “Add”, and continue by filling in the competency data for the goal that has been set.
🔥IMPORTANT! It's worth paying attention to if you want add Outcomes on a Goal, make sure Competency in the Performance menu has been made first.
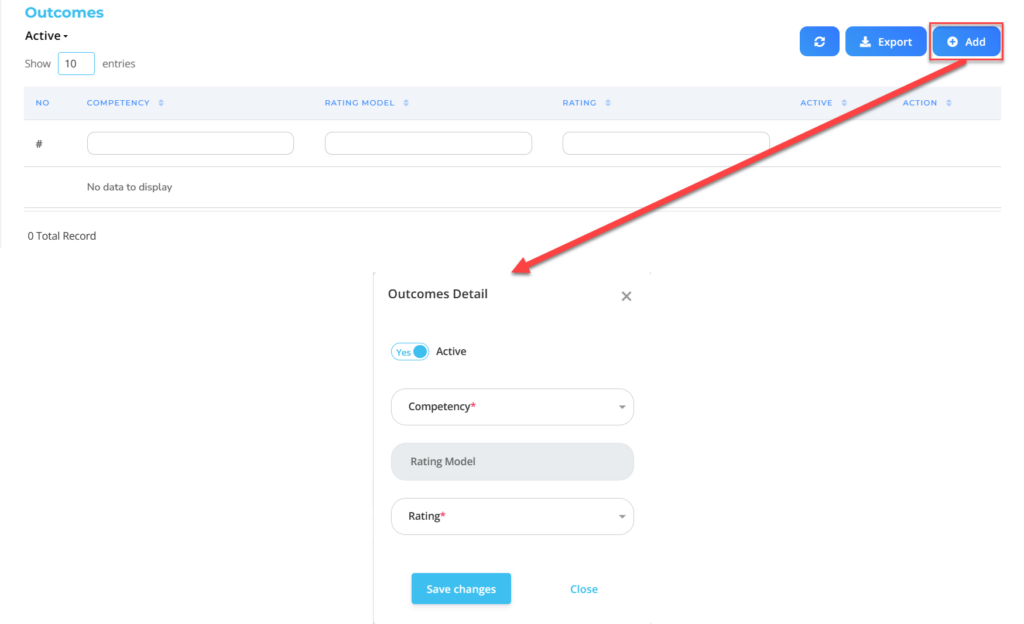
| No | Feature | Information |
| 1 | Active | • Click Yes, if the Outcomes are still active and processed in system. • Click No, if these Outcomes have been achieved not active, then the Outcomes will be automatic lost in another menu. |
| 2 | Competency | Fill in accordingly competence which will be achieved. |
| 3 | Rating Model | Automatically filled in accordance with the competence which has been selected. |
| 4 | Rating | Filled with rating according to competence. |
Do save with a click button “Save Changes” in the Outcomes Details section first, then continue by filling in other complete Goal Library data.
- If you have entered all the Goal Library information, then the final step is to do it save with a click button “Submit” at the very bottom of the Goal Library page.
Read Also :
– How to Add Planning Based on Goals That Have Been Made