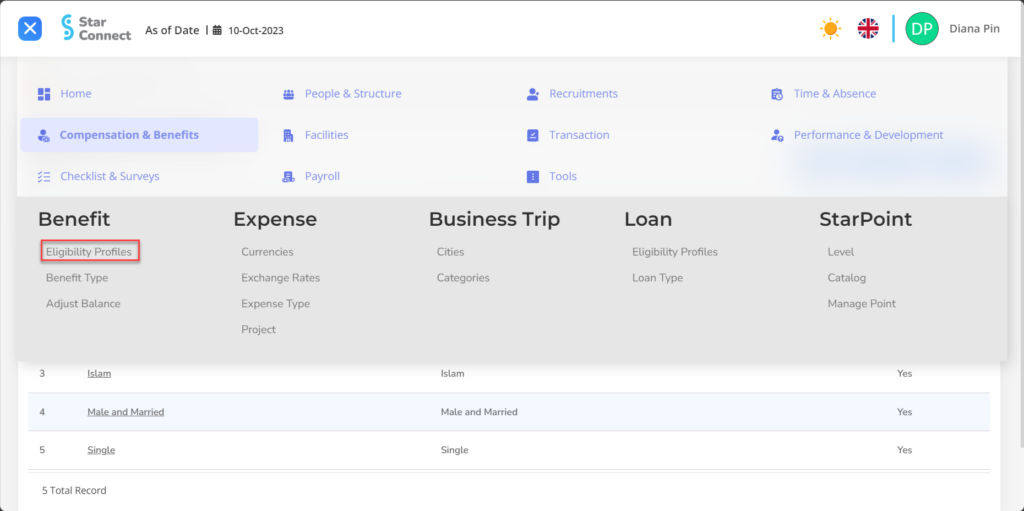
If you want Registering the type of allowance Employees inside system, You must Make an employee grouping type based on the type of allowance said first.
Registration of types of employee grouping based on the type of allowance can be made with Eligibility Profiles On the Benefit menu, and registration type of employee allowance can be made with Benefit Type On the Benefit menu.
In this section, You can learn :
1. How to make an eligibility profiles.
2. How to Make Benefit Type.
1. How to Create Eligibility Profiles.
- On the Menu Benefit → Select Eligibility Profiles.
- Click the button New To register Eligibility Profiles on the Benefit menu.
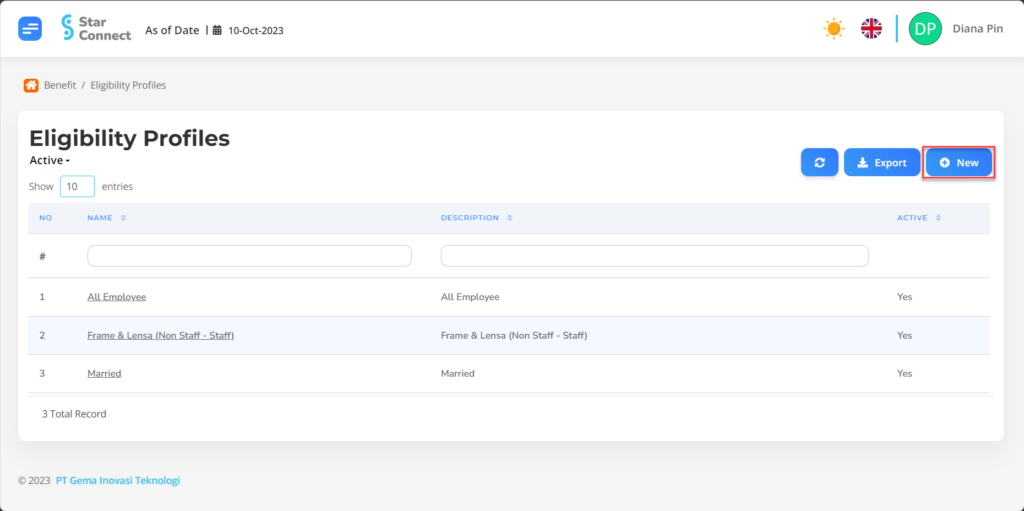
- In part General, isi with the type of Eligibility Profiles you want to display.

| No | Feature | Information |
| 1 | Name | Filled with no Eligibility Profiles. |
| 2 | Description | Filled with description Eligibility Profiles. |
| 3 | Active | • Click Yes, if the Eligibility Profiles type is still active and processed in system. • Click No, if the Eligibility Profiles type is already in place not active, then the Eligibility Profiles type will be automatic lost in another menu. |
- In part Criteria, click the button “Create”, and continue by filling in the criteria of the employee to be determined by the benefit type.
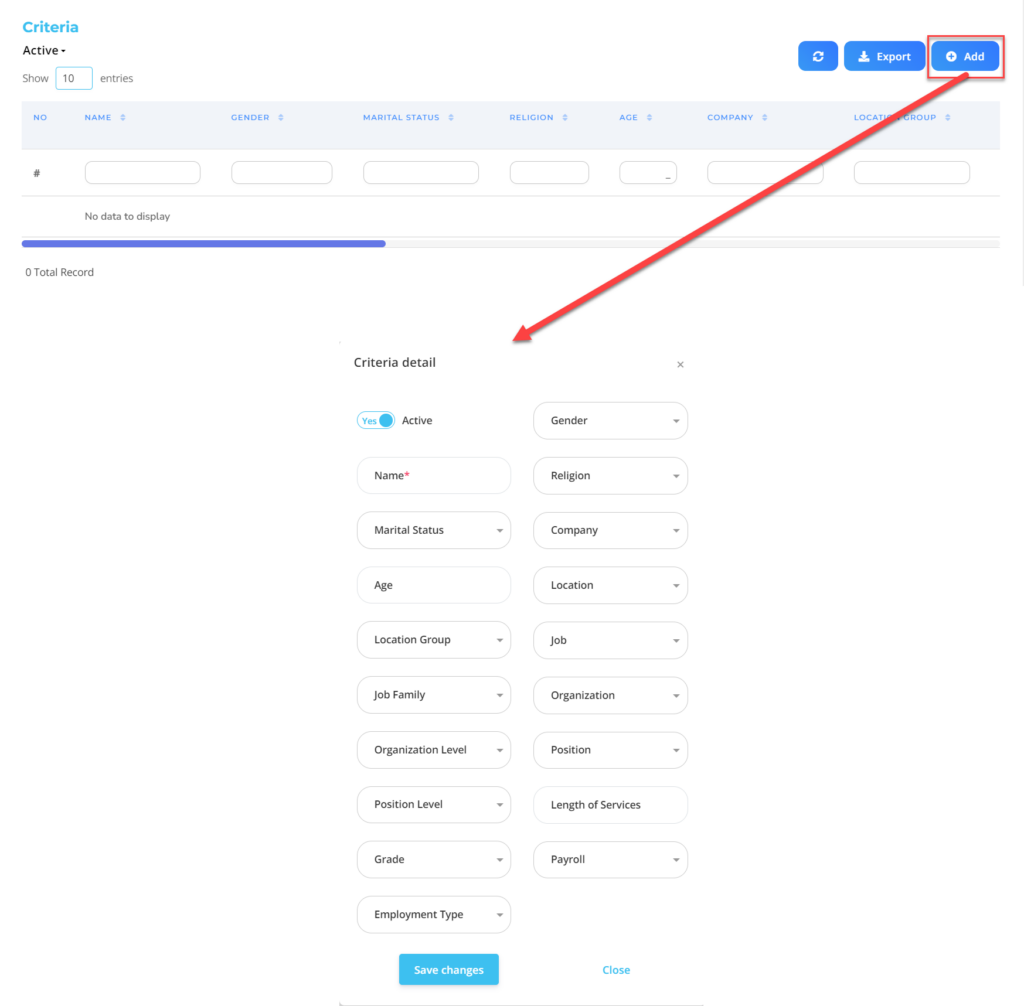
| No | Feature | Information |
| 1 | Active | • Click Yes, If the Eligibility Profile details for the benefit are still active and processed in system. • Click No, If the Eligibility Profile details for benefits already not active, then the Eligibility Profile Detail Data for Benefit will be automatic lost in another menu. |
| 2 | Name | Filled no Eligibility Profile for employee benefits. |
| 3 | Marital Status | Filled with details marital status which will be included in the Eligibility Profile. |
| 4 | Age | Filled with details age which will be included in the Eligibility Profile. |
| 5 | Location Group | Filled with details Location Group which will be included in the Eligibility Profile, in the form of LOV. |
| 6 | Job Family | Filled with details Job Family which will be included in the Eligibility Profile, in the form of LOV. |
| 7 | Organization Level | Filled with details Organization Level which will be included in the Eligibility Profile, in the form of LOV. |
| 8 | Position Level | Filled with details Position Level which will be included in the Eligibility Profile, in the form of LOV. |
| 9 | Grade | Filled with details Grade which will be included in the Eligibility Profile, in the form of LOV. |
| 10 | Employment Type | Filled with details Employment Type which will be included in the Eligibility Profile, in the form of LOV. |
| 11 | Gender | Filled with details gender which will be included in the Eligibility Profile, in the form of LOV. |
| 12 | Religion | Filled with details religion which will be included in the Eligibility Profile, in the form of LOV. |
| 13 | Company | Filled with details Company which will be included in the Eligibility Profile, in the form of LOV. |
| 14 | Location | Filled with details Location which will be included in the Eligibility Profile, in the form of LOV. |
| 15 | Job | Filled with details Job which will be included in the Eligibility Profile, in the form of LOV. |
| 16 | Organization | Filled with details Organization which will be included in the Eligibility Profile, in the form of LOV. |
| 17 | Position | Filled with details Position which will be included in the Eligibility Profile, in the form of LOV. |
| 18 | Length of Services | Filled with details minimum working hours Eligible employees are included in the Eligibility Profile, in the form of LOV. |
| 19 | Payroll | Filled with details Payroll which will be included in the Eligibility Profile, in the form of LOV. |
Do save with a click button “Save Changes” in the criteria section first, then continue by filling in the other complete Eligibility Profiles data.
- If you have entered all the Eligibility Profiles information, then the final step is to do it save with a click button “Submit” at the very bottom of the Eligibility Profiles page.
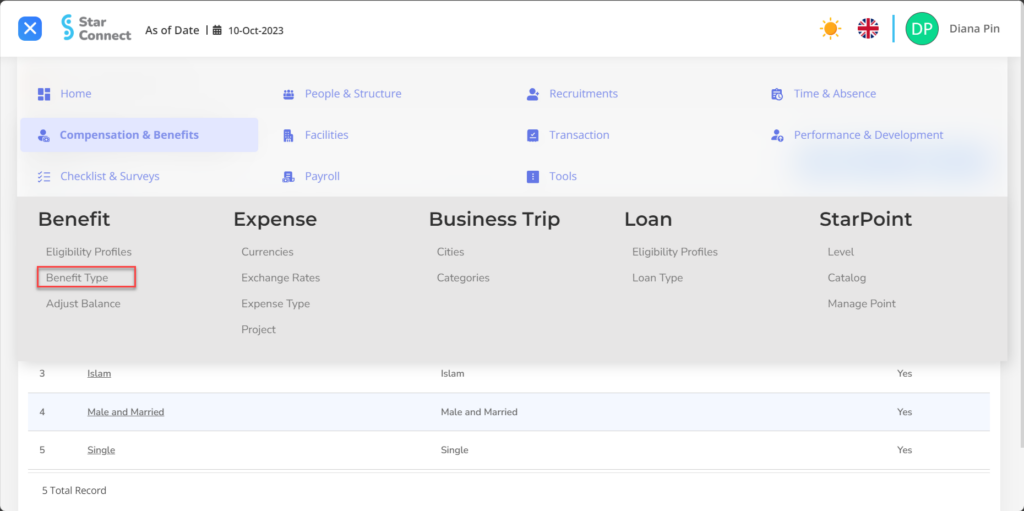
2. How to Make Benefit Type.
- On the Menu Benefit → Select Benefit Type.
- Click the button New To register Type Benefit.

- In part General, isi with the type of benefit type you want to display.
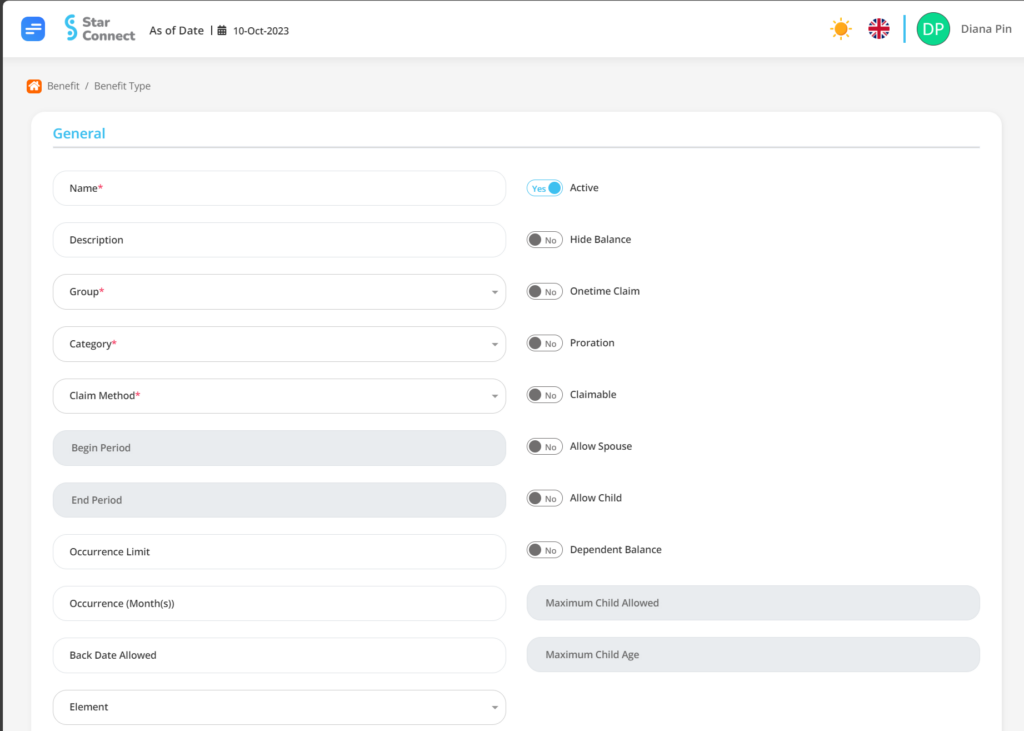
| No | Feature | Information |
| 1 | Name | Filled with no Benefit type. |
| 2 | Description | Filled with description Benefit type. |
| 3 | Group | Filled with grouping employee benefits, example: Medical, Non Medical, and others. |
| 4 | Category | Filled with category Benefit type, example: Health, Gigi, and others. |
| 5 | Claim Method | Filled with claim provisions according to the type of benefit, example: fit the bill, Based on Amount. |
| 6 | Begin Period | Starting limit period claim in the form of bill. |
| 7 | End Period | Deadline period claim in the form of bill. |
| 8 | Occurrence Limit | The limit for submitting benefits per periode Occurrence Months. Example: 1, then the employee can only submit a claim 1 times during his working time. |
| 9 | Occurrence Months | Application period limit Employees can make claims according to their limits. Example: 2, then in each 2 months employees can claim according to the Occurrence Limit. |
| 10 | Back Date Allowed | Rapel limit employees in applying for Benefits. |
| 11 | Active | • Click Yes, if the Benefit Type for the Benefit is still active and processed in system. • Click No, if Benefit Type for Benefit already not active, then the Benefit Type data for Benefits will be automatic lost in another menu. |
| 12 | Hide Balance | • Click Yes, if you want hide remaining benefits in the employee menu. • Click No, if you want bring up remaining benefits in the employee menu. |
| 13 | Onetime Claim | • Click Yes, If benefits can only be claimed 1 kali during the employee's employment period. • Click No, if benefits can be claimed more than 1 kali during the employee's employment period. |
| 14 | Proration | • Click Yes, if the value of Benefit adapt minimum employee work period. • Click No, if the value of Benefit does not adapt minimum employee work period. |
| 15 | Claimable | • Click Yes, if benefits can be claimed during the employee's employment period. • Click No, if benefits cannot be claimed during the employee's employment period. |
| 16 | Allow Spouse | • Click Yes, if Benefit can be used by the employee's spouse. • Click No, if Benefit can not be used by the employee's spouse. |
| 17 | Allow Child | • Click Yes, if Benefit can be used by employees' children. • Click No, if Benefit can not be used by employees' children. |
| 18 | Dependent Balance | • Click Yes, if the employee's spouse and children receive benefits equally separated. • Click No, if the nominal benefit is for employees combined for spouses and children. |
| 19 | Maximum Child Allowed | Filled with maximum number of children employees who are entitled to benefits. |
| 20 | Maximum Child Age | Filled with maximum age limit for children employees who are entitled to benefits. |
| 21 | Element | Filled with Element which is suitable for the Benefit to be made. |
- In part Detail, choose Add then continue by filling in employee grouping data based on the Benefit Type Details that have been created for the benefits that will be used by the company for each type of employee.
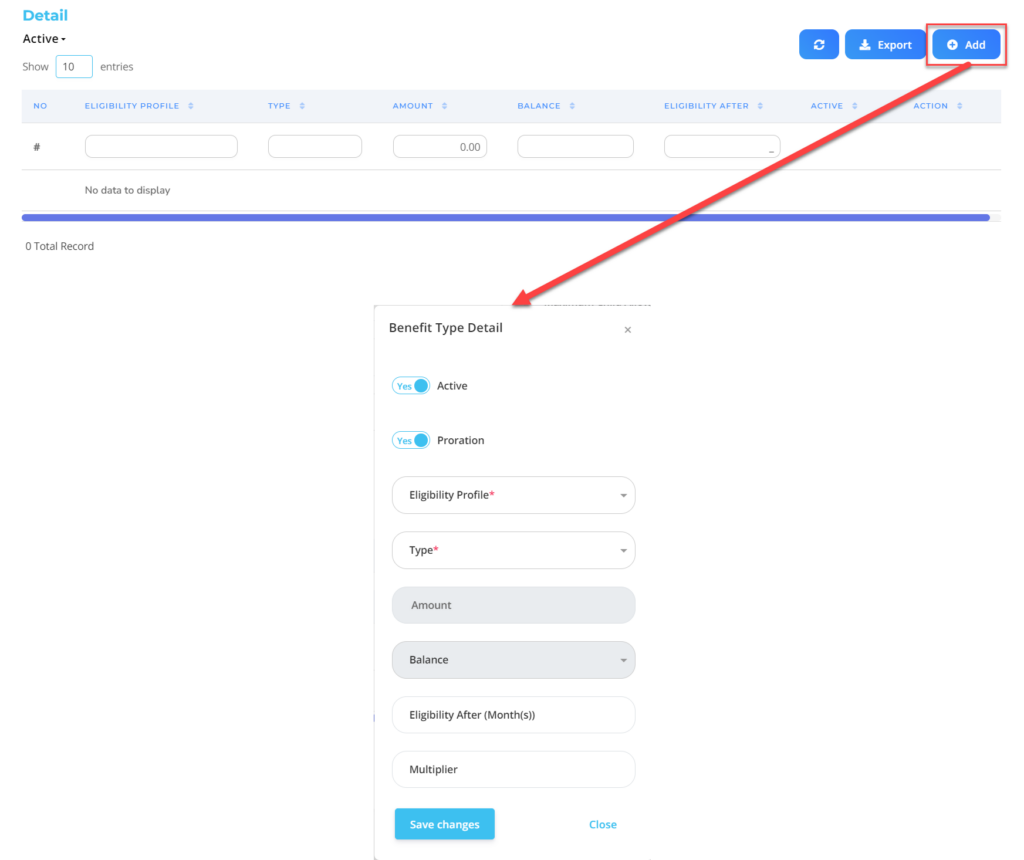
| No | Feature | Information |
| 1 | Active | • Click Yes, if the details of the type of benefit are still available active and processed in system. • Click No, if the details of the type of Benefit are available not active, then the details of the Benefit type will be automatic lost in another menu. |
| 2 | Proration | • Click Yes, if the value of Benefit adapt minimum employee work period. • Click No, if the value of Benefit does not adapt minimum employee work period. |
| 3 | Eligibility Profile | Filled with groupings Eligibility Profile employees who will receive benefit rights. |
| 4 | Type | Filled in to select type amount or balance |
| 5 | Amount | Filled with nominal Benefits that employees will get. |
| 6 | Balance | Fill in the value of the balance of benefits that the employee will receive. |
| 7 | Eligible After (Month)s) | Filled Minimum Boundaries of Start Employees' Work Time who got the rights of the benefits, example: 3, then the benefits can begin to be used on the moon to 3 Early employee service period. |
| 8 | Multipiler | Fill in how many multiplier for the benefits that employees will get, If there are. |
Do save with a click button “Save Changes” In each part first, then continue by filling in the completeness of other types of be benefit data.
- If you have entered all Benefit Type information, then the final step is to do it save with a click button “Submit” At the bottom of the Benefit Type page.
Read Also :
– How to Provide Special Benefit Rights