If you want create an employee checklist template based on the tasks that the employee must complete, You must create groupings of employees based on checklist type said first.
Creating an employee checklist template can be created using Template on the Checklist Menu, and for grouping employees based on type, the checklist can be created using Eligibility Profiles on the Checklist Menu.
In this section, You can learn :
1. How to create Eligibility Profiles.
2. How to create a template.
1. How to Create Eligibility Profiles.
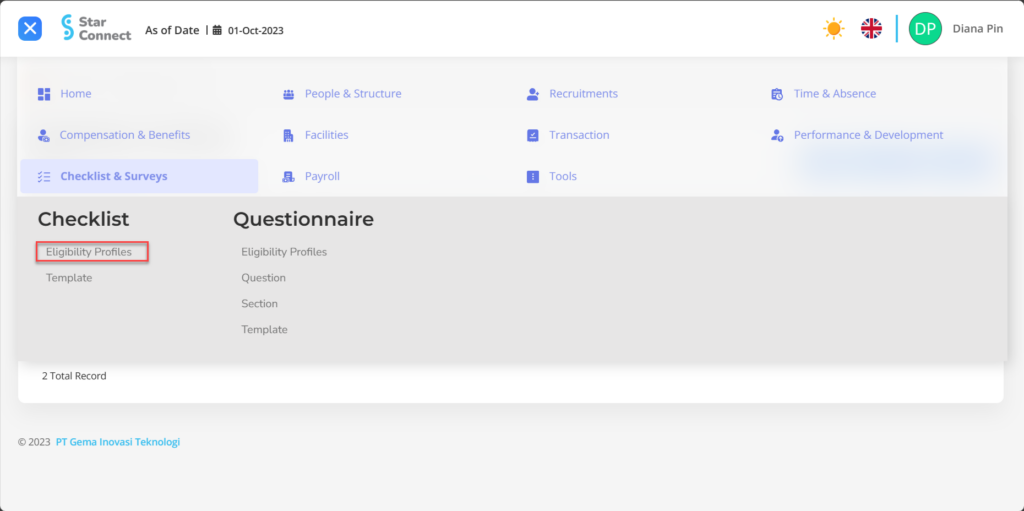
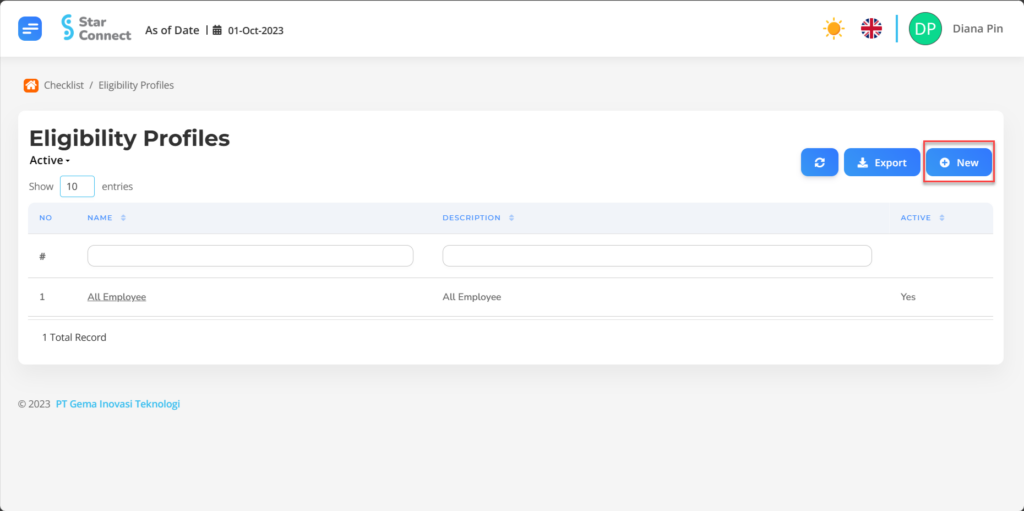
- On the Menu Checklist → Select Eligibility Profiles.
- Click the button New to register the Eligibility Profiles you want to display.
- In part General, isi with the type of Eligibility Profiles you want to display.

| No | Feature | Information |
| 1 | Name | Filled with no Eligibility Profiles. |
| 2 | Description | Filled with description Eligibility Profiles. |
| 3 | Active | • Click Yes, if the Eligibility Profiles type is still active and processed in system. • Click No, if the Eligibility Profiles type is already in place not active, then the Eligibility Profiles type will be automatic lost in another menu. |
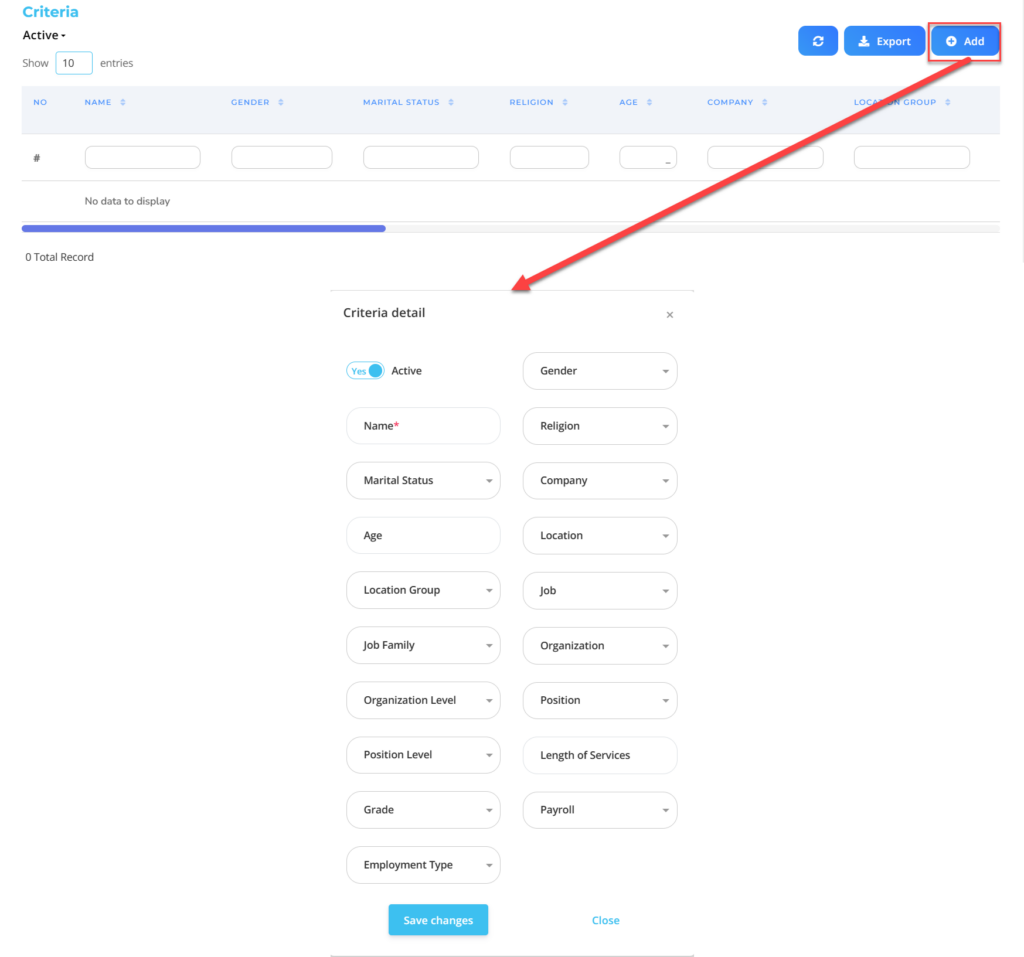
- In part Criteria, click the button “Add”, and continue by filling in the employee criteria grouping data on the checklist that the company will apply to each type of employee.
| No | Feature | Information |
| 1 | Active | • Click Yes, if the detailed Eligibility Profiles for the Checklist are still active and processed in system. • Click No, if the detailed Eligibility Profiles for the Checklist are complete not active, then the detailed Eligibility Profiles data for the Checklist will be automatic lost in another menu. |
| 2 | Name | Filled no Eligibility Profiles for employee checklist. |
| 3 | Marital Status | Filled with details marital status which will be included in the Eligibility Profiles. |
| 4 | Age | Filled with details age which will be included in the Eligibility Profiles. |
| 5 | Location Group | Filled with details Location Group which will be included in the Eligibility Profiles, in the form of LOV. |
| 6 | Job family | Filled with details Job Family which will be included in the Eligibility Profiles, in the form of LOV. |
| 7 | Organization level | Filled with details Organization Level which will be included in the Eligibility Profiles, in the form of LOV. |
| 8 | Position level | Filled with details Position Level which will be included in the Eligibility Profiles, in the form of LOV. |
| 9 | Grade | Filled with details Grade which will be included in the Eligibility Profiles, in the form of LOV. |
| 10 | Employment type | Filled with details Employment Type which will be included in the Eligibility Profiles, in the form of LOV. |
| 11 | Gender | Filled with details gender which will be included in the Eligibility Profiles, in the form of LOV. |
| 12 | Religion | Filled with details religion which will be included in the Eligibility Profiles, in the form of LOV. |
| 13 | Company | Filled with details Company which will be included in the Eligibility Profiles, in the form of LOV. |
| 14 | Location | Filled with details Location which will be included in the Eligibility Profiles, in the form of LOV. |
| 15 | Job | Filled with details Job which will be included in the Eligibility Profiles, in the form of LOV. |
| 16 | Organization | Filled with details Organization which will be included in the Eligibility Profiles, in the form of LOV. |
| 17 | Position | Filled with details Position which will be included in the Eligibility Profiles, in the form of LOV. |
| 18 | Length of services | Filled with details minimum working hours Eligible employees are included in the Eligibility Profiles, in the form of LOV. |
| 19 | Payroll | Filled with details Payroll which will be included in the Eligibility Profiles, in the form of LOV. |
Do save with a click button “Save Changes” in the detailed Criteria section first, then continue by filling in the other complete Eligibility Profiles data.
- If you have entered all the Eligibility Profiles information, then the final step is to do it save with a click button “Submit” at the very bottom of the Eligibility Profiles page.
2. How to Create Templates.
- On the Menu Checklist → Select Template.

- Click the button New to register the Template on the Checklist menu.
- In part General, isi with the type of template you want to display.
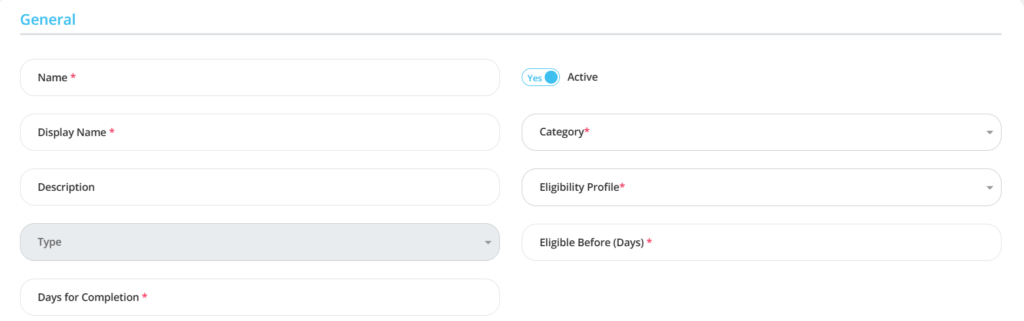
| No | Feature | Information |
| 1 | Name | Filled with no The template to be created. |
| 2 | Display Name | Filled with name display The template will appear. |
| 3 | Description | Filled with description the template. |
| 4 | Type | Enter status employee, example: Contract, Internship, Permanent, Probation, and others, in the form of LOV. |
| 5 | Days for Completion | Filled with day limit employee complete the Checklist Template. |
| 6 | Active | • Click Yes, if the Template is still active and processed in system. • Click No, if the Template is already not active, then the data will be automatic lost in another menu. |
| 7 | Category | Filled with Category according to template. |
| 8 | Eligibility Profile | Filled with employee grouping who can access Templates. |
| 9 | Eligible Before (Days) | Filled the number of days before the template can be accessed. example: 3, then the template can be accessed 3 days before the template was officially released. |
- In part Tasks, click the button “Add”, and continue by filling in the Item data for the Checklist Template that will be used by the company.
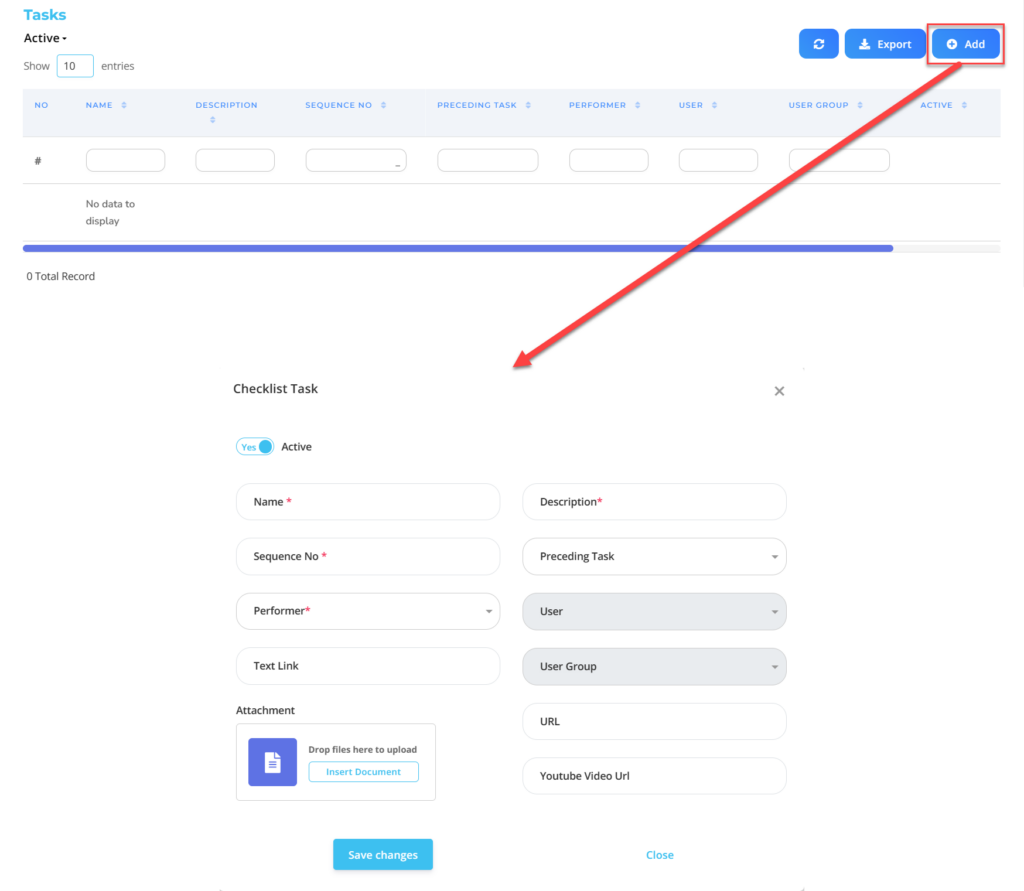
| No | Feature | Information |
| 1 | Active | • Click Yes, if the Checklist Task is still there active and processed in system. • Click No, if the Task Checklist is complete not active, then the Checklist Task type will be automatic lost in another menu. |
| 2 | Name | Filled with no Task checklist that will be an assessment item on the template |
| 3 | Sequence No | Filled with order Task checklist that will appear in the template. |
| 4 | Performer | Filled with category employee/user who will fill in the task. |
| 5 | Text Link | Enter naming from URL that employees will access. |
| 6 | Attachment | Enter document tasks that employees will access. |
| 7 | Description | Filled with description Checklist Task. |
| 8 | Preceding Task | Filled with tasks completed first first so that the task being created can be accessed, in the form of LOV. |
| 9 | User | Filled with User employees who will access the task. |
| 10 | User Group | Filled with User Group which will access the task. |
| 11 | URL | Enter website link for tasks that employees will access. |
| 12 | Youtube Video URL | Enter Youtube video website link which will be accessed if any. |
Do save with a click button “Save Changes” in the Task Checklist section first, then continue by filling in the rest of the template data.
- If you have entered all the template information, then the final step is to do it save with a click button “Submit” at the very bottom of the Template page.
Read Also :
– How to Manage Performance
– How to Manage Questionnaires
– How to Manage Payroll
– How to Manage Security
– How to Manage Tools